What are the best lenses for landscape photography? It is one of the most common gear questions I hear, and the answer really depends on your style and what you enjoy photographing. A 10-24mm, 16-35mm, 24-70mm, 24-105mm, or 70-200mm could all have a place in a landscape photographer’s bag.
But having a place in the bag and actually earning that place are two different things.
Over two years, I made a concerted effort to reduce my camera equipment and simplify my workflow. I went from six lenses, evenly split between primes and zooms, to just two: a 16-35mm wide-angle zoom and a 100-400mm telephoto zoom.
One handles immersive landscapes with strong foregrounds. The other lets me isolate distant details, simplify busy scenes, and find photographs when the sky is doing absolutely nothing for me. Together, they cover the way I like to photograph remarkably well.
Key Takeaways
- Choose focal ranges around the photographs you actually make, rather than covering every possible millimeter.
- A 16-35mm zoom supports immersive scenes, close foregrounds, and strong foreground-to-background depth.
- A 100-400mm zoom isolates distant details and helps exclude an uninteresting sky.
- A smaller lens kit reduces carrying weight and simplifies compositional decisions in the field.
Why I Sold My Prime Lenses
There was nothing wrong with the prime lenses I owned. They were lightweight, extremely sharp, and generally less expensive than many zoom lenses. The problem was simply that they could not zoom.
Of course, I knew that when I bought them. I figured I could move a few steps forward or backward whenever I needed to adjust my composition. That sounded perfectly reasonable until I kept finding myself in places where moving was not an option.
At the edge of a cliff or mountain, one more step forward is not a compositional solution. Standing knee-deep in a stream or the ocean, I often needed just a slightly tighter frame without feeling comfortable going any farther into the water.
Those situations happened enough that the flexibility of a zoom became much more important to me than the advantages of my primes. I wanted to adjust my framing from the position I could safely occupy. That is why I eventually moved entirely to zoom lenses for this kit.
1. A 16-35mm Wide-Angle Zoom for Immersive Landscapes
My wide-angle choice came down to a 10-24mm zoom, a roughly 24mm prime, and a 16-35mm zoom. Once I decided to move away from primes, the real question was how wide I actually liked to photograph.
I used the 16-35mm substantially more than the 10-24mm. More importantly, most of my photographs with it fell between about 19mm and 35mm. I simply did not have much appetite for going wider than that, so keeping the wider zoom felt redundant.
The lens I kept is the Sony 16-35mm f/2.8 G Master. It is expensive, but it is a fantastic lens and probably my most frequently used focal range for landscape photography. The reason it stayed was not just image quality. It suited the compositions I was already making.
Broad scenes that feel inviting
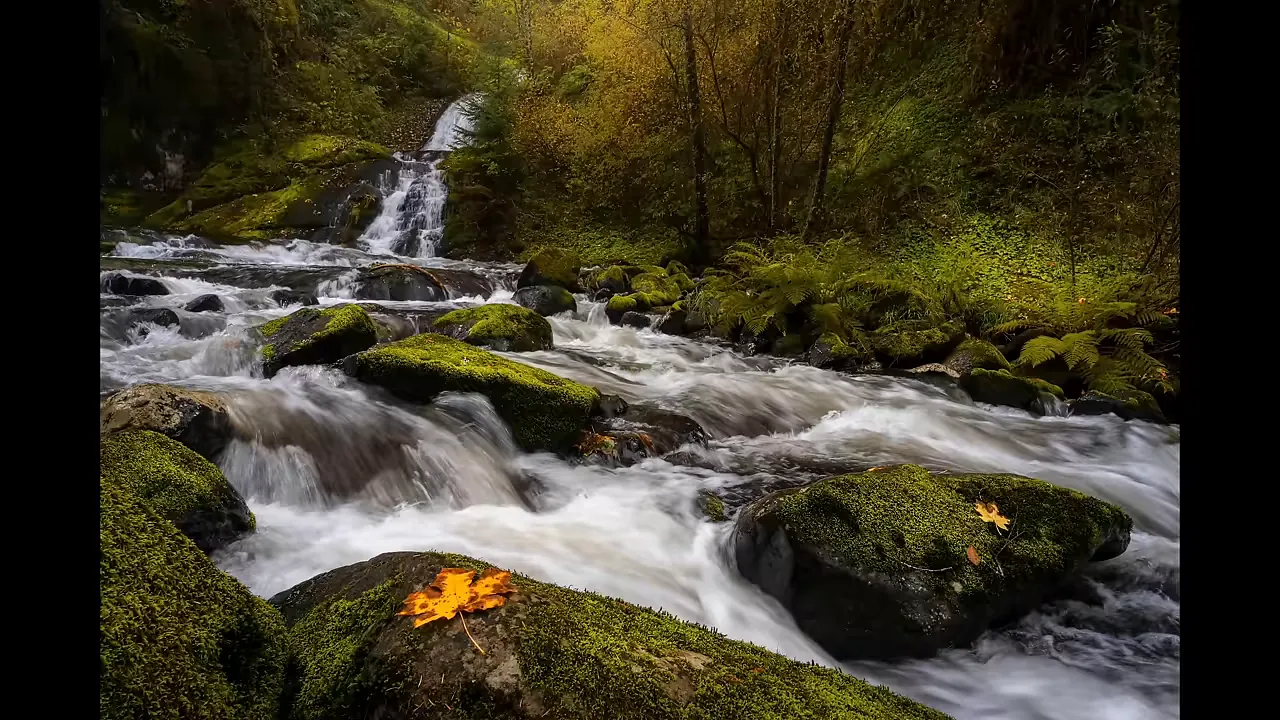
A wide-angle zoom gives me room to include a sweeping coastline, a stream winding through woodland, or a broad desert landscape. Those photographs can feel wonderfully immersive, almost as though you could step into the scene.
That feeling is especially strong when the foreground gives you somewhere to enter the photograph. Nearby rocks, plants, and flowing water can connect the bottom of the frame to the landscape beyond.
Vertical compositions with real depth
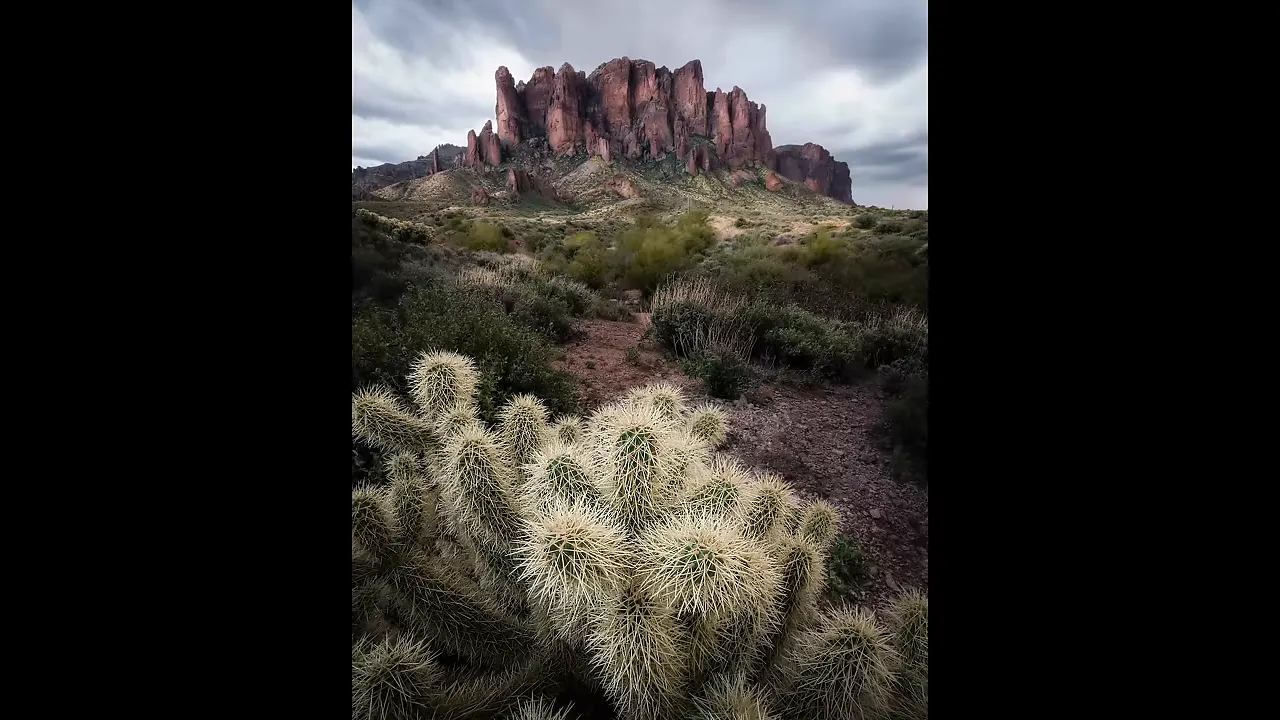
As much as I enjoy a sweeping horizontal landscape, I absolutely love using this lens vertically. Much of my portfolio is made up of vertical compositions because that orientation gives me so much room to work from the foreground to the background.
I can get close to an interesting subject and build the photograph around three distinct areas:
- Foreground: A nearby plant, rock, or patch of grass that anchors the composition.
- Midground: The space that carries the eye through the scene.
- Background: Mountains, cliffs, or a waterfall that complete the photograph.
Separating those areas helps create a three-dimensional feeling in a two-dimensional image. A cactus does not have to be enormous to become a strong foreground subject. Getting the camera very close can make it feel substantial while still including the distant landscape.
Using wide-angle perspective creatively
The exaggerated near-to-far relationship is one of my favorite things about working wide. A small patch of grass can become a major compositional element simply because the camera is close to it.
There is a trade-off, though. Distant mountains can look smaller and farther away than you want them to. Camera angle matters here. Tilting the camera downward slightly can stretch features near the upper part of the frame, which can sometimes help distant peaks feel taller. It is a creative effect worth exploring rather than assuming every wide-angle photograph needs the same camera position.
My wide-angle composition demonstration explores this approach further. For a broader explanation of focal length and perspective, Cambridge in Colour’s camera lens guide is also a useful reference.
The drawback: an uninteresting sky is hard to hide
For the way I compose, a 16-35mm is often very dependent on what is happening in the sky.
Whether I am working horizontally or vertically, a broad composition frequently includes a substantial amount of sky. If that sky is completely clear and adds nothing to the photograph, it can weaken an otherwise promising scene.
There are ways around it. Woodland compositions, for example, can exclude the sky altogether. But in open landscapes, it is often difficult to include everything I want on the ground without also including the sky above it.
That is where the second lens becomes so important.
2. A 100-400mm Telephoto Zoom for Intimate Landscapes
The other lens I kept is the Sony 100-400mm G Master. It is less commonly associated with landscape photography than a wide-angle zoom, but man, it opens up a tremendous number of possibilities.
I previously owned a 70-200mm. Looking at how I used it, most of my photographs were made somewhere around 125mm or 135mm through 200mm. I was consistently working toward the long end and remembering situations where I wanted more reach.
Moving to a 100-400mm gave me that reach. Like my wide-angle lens, the G Master is expensive, but there are less expensive lenses in this general category. The useful part of the decision is the focal range and what it allows you to compose, not simply the premium lens label.
Finding several photographs within one landscape
Yosemite Valley is a great example of how these two lenses complement each other. With a wide-angle lens, I can photograph the valley as a whole, including its cliffs, forest, waterfall, and sky.
Switching to the 100-400mm lets me concentrate on the area around Bridalveil Fall. Zooming in farther lets me make a much tighter photograph of the waterfall itself.
Those are different compositions with different subjects and different visual emphasis. The wide-angle image tells the larger story of the place. The telephoto lets me explore individual pieces of it.
Removing a bland sky from the composition
One evening photographing Half Dome, the light was fantastic. The setting sun was illuminating the rock beautifully, but the sky was bland. I tried to minimize it in my wide-angle composition without crowding the top of Half Dome, and the photograph still was not working the way I wanted.
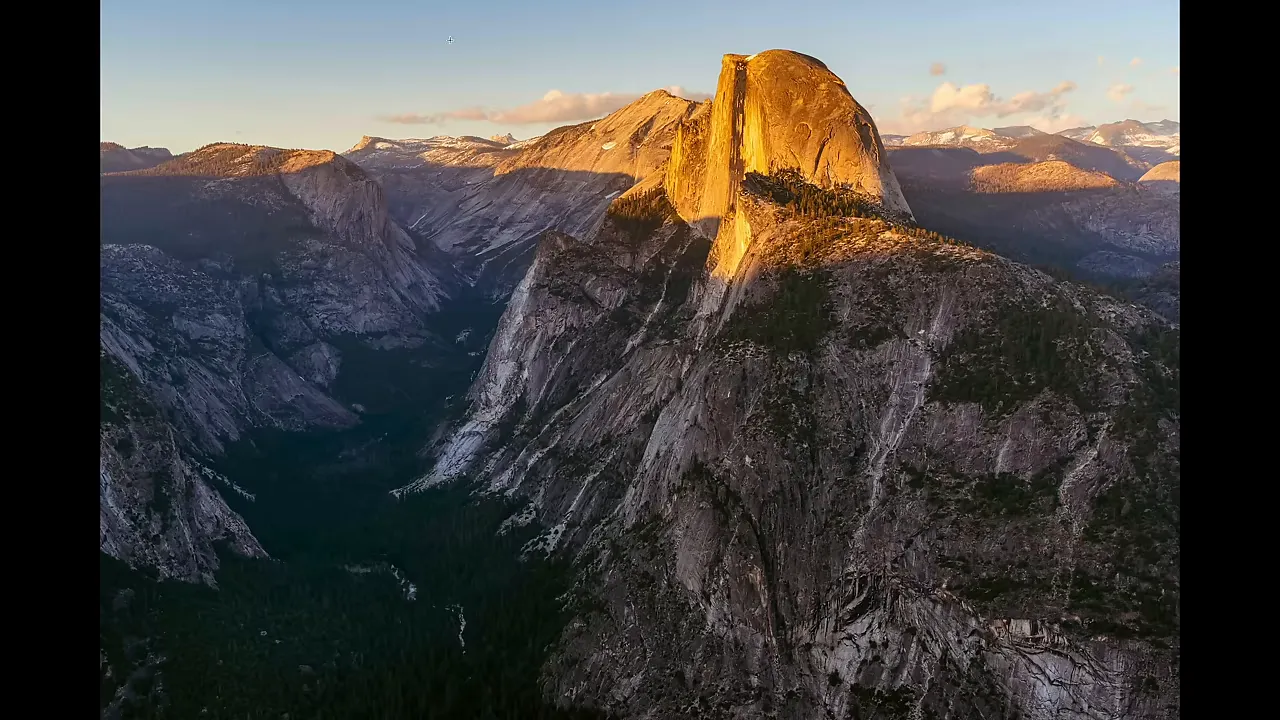
I switched to the 100-400mm and made a tighter composition. I liked that better, but there was still an uninteresting strip of sky at the top.
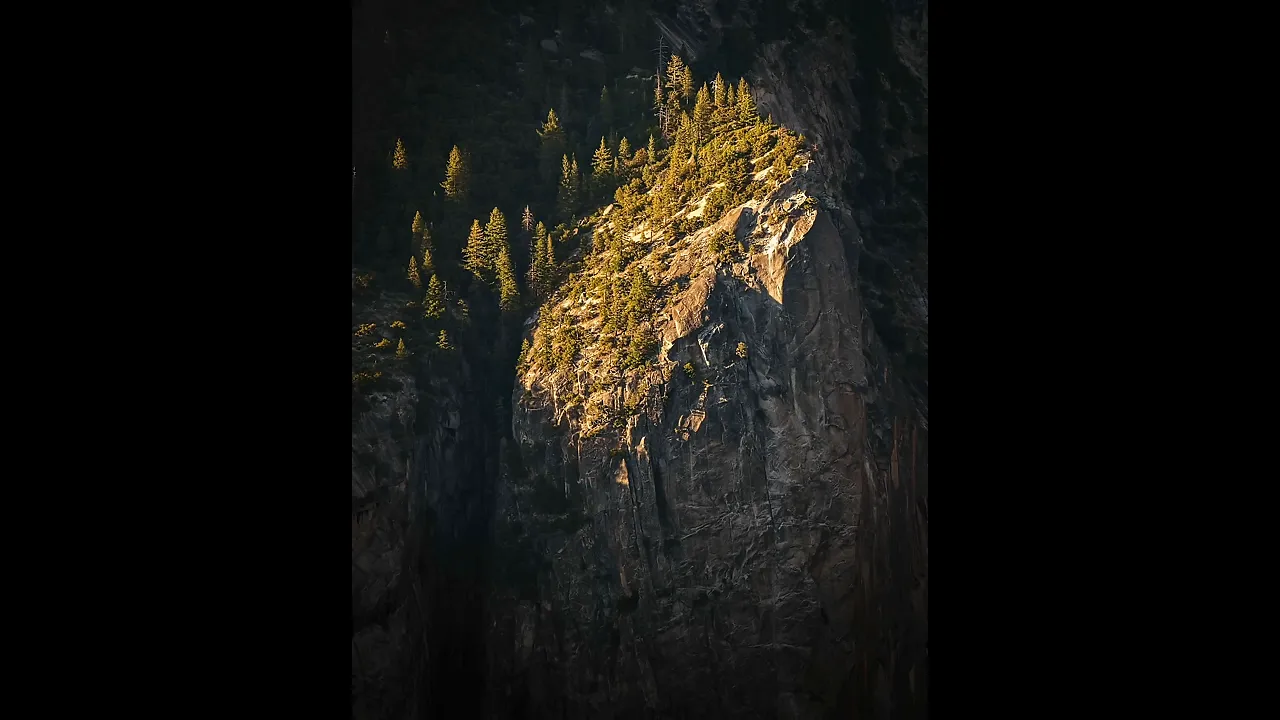
Then I zoomed all the way to 400mm and concentrated on the rock face where the warm sunlight met the cool shadows. Small trees provided a sense of scale, and the sky disappeared entirely.
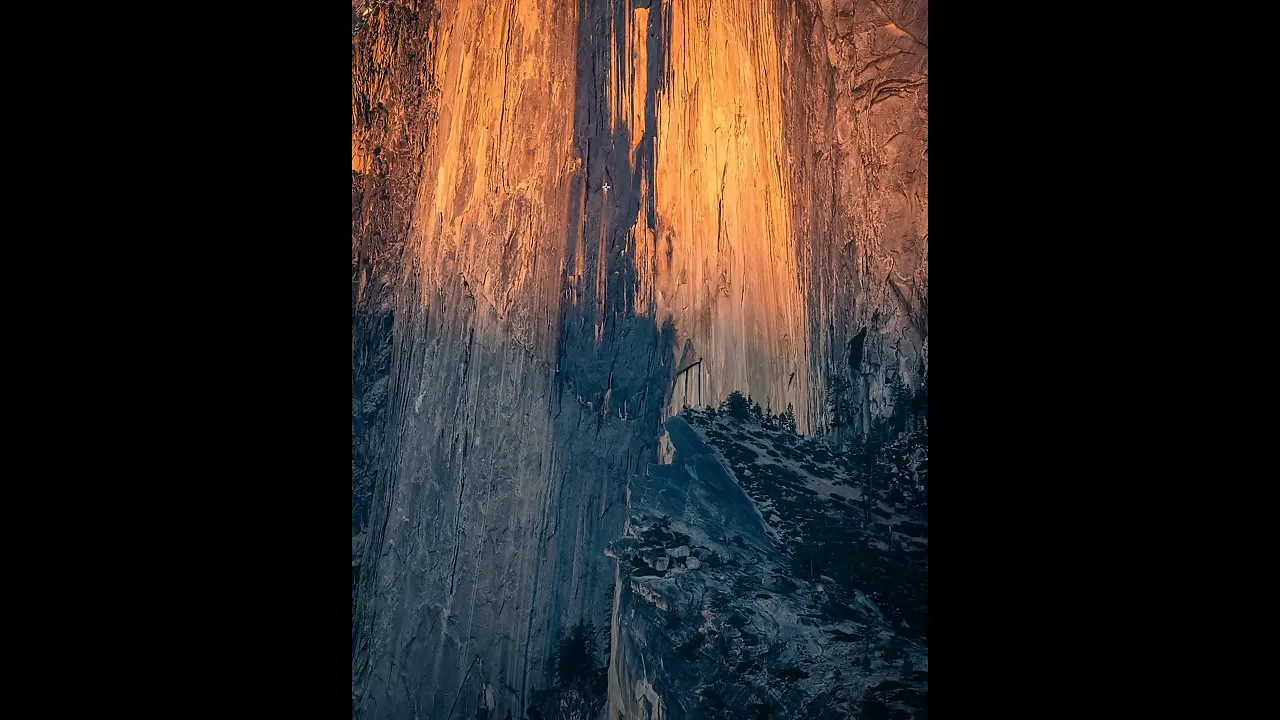
That tighter photograph really saved the situation for me. The light had been useful all along. I just needed a focal length that let me exclude the part of the scene that was not helping.
A long lens does not make weather irrelevant, but it does make me less dependent on an interesting sky. If the grand landscape is not coming together, I can look for a smaller photograph within it.
Isolating pockets of light, texture, and detail
On that same outing, I noticed sunlight catching a small group of trees along the edge of a cliff. With the telephoto already mounted, I could isolate that illuminated area and make a much more intimate landscape photograph.
That is a completely different way of searching for compositions. Instead of asking how to fit the whole scene into the frame, I am looking for the specific detail that deserves attention.
A cliff peak emerging through clouds can become the entire subject instead of disappearing inside a broad photograph of cloud cover. The texture of a tree trunk can fill the frame at 400mm. A waterfall can become a study of movement and surrounding rock rather than one small feature in a valley.
Building compositions from distant layers
I also love the compressed appearance of landscapes photographed with a long lens. From a distant position, a tight frame can bring layers together visually and make their relationships much more prominent.
In Yosemite Valley, that approach lets me build a composition around El Capitan, Half Dome, and the intervening landscape. With a wide-angle view, those distant features would occupy much less of the photograph.
Another example is a scene near Santa Barbara with layers of trees and rolling hills. I believe I used a teleconverter for that image, bringing the focal length to roughly 600mm. The tight view emphasized the overlapping layers and created a photograph that felt very different from the broader scene in front of me.
The Trade-Offs of Carrying a Long Landscape Lens
The 100-400mm is not without its downsides. It is substantially heavier than my wide-angle zoom, and keeping it steady takes more care, particularly when the lens is extended and the hood is attached.
For tripod-based landscape photography with this kind of lens, I pay particular attention to a few things:
- Give vibrations time to settle. I recommend a 10-second self-timer so the setup can stabilize after you touch the camera.
- Be conscious of wind. A breeze can make a long, extended lens difficult to keep still.
- Consider removing the lens hood. If wind is causing vibration, taking the hood off may help.
- Take extra care with longer exposures. Small movements become especially troublesome when the shutter remains open.
Those are practical compromises, but the compositional flexibility is absolutely worth them for me.
Why Two Lenses Simplified My Photography
This combination leaves a gap between 35mm and 100mm. It does not provide continuous coverage of every focal length, and it is not a claim that every landscape photographer should sell everything else.
What matters is that these two ranges match the way I photograph. At the wide end, I can work with close foregrounds, depth, and sweeping scenes. At the long end, I can isolate subjects, explore distant details, and simplify a landscape when the wider composition is not working.
My biggest regret is honestly that I did not simplify sooner.
I had spent well over $10,000 on the six lenses I owned, and I recovered only around half of that when I sold them. Some of those lenses had barely been used. That was an expensive way to discover what I actually needed.
With two lenses, I can bring my whole lens kit everywhere. The overall load is more comfortable to hike with, even though the telephoto itself is heavy. More importantly, I no longer open my bag and work through a long list of overlapping choices.
The decision is wonderfully simple: Do I want to go wide, or do I want to go long?
That is the real benefit of this two-lens landscape photography kit. It gives me two distinctly useful ways to respond to the landscape, without carrying a collection of equipment I rarely use.


