A useful photo editing update doesn’t always need to make a bigger, more dramatic change. Sometimes the real improvement is making an effect easier to control, easier to keep subtle, or easier to apply in a way you hadn’t considered.
That’s what stands out to me about Luminar’s fall update. The updated Enhance tool is more refined, Atmosphere 2.0 gives you impressive control over where fog settles, and Smart Compositions suggests alternative crops based on your photograph.
I tested all three on my own landscape photos, including colorful mountain scenes, forest streams, waterfalls, and coastal images. Atmosphere 2.0 impressed me the most, but each tool brings something useful to the editing process.
Luminar sponsored this look at the update.
Key Takeaways
- The updated Enhance tool makes quick adjustments easier to keep subtle and refined.
- Atmosphere 2.0 offers detailed fog placement, with my best results building on existing mist.
- Smart Compositions suggests alternative crops, but your judgment still determines the strongest framing.
The Updated Enhance Tool: Less Overcooked, More Refined
The Enhance tool has always offered a quick way to make a substantial change with very little work. The problem with the older version was how easily you could push it too far. Move the slider a little beyond the sweet spot, and the whole photograph could start to look overcooked.
The updated version looks familiar and works the same way. The difference is in the result: the adjustments feel more restrained and polished.
Pushing the Sliders to See What Happens
I started with a mountain photograph full of yellow autumn foliage, red foreground vegetation, and a dramatic sky. It’s exactly the kind of colorful scene that can quickly become too much.
To test the update, I pushed both the main Enhance adjustment and Sky Enhancer to 100. With the older tool, I would have expected a pretty ridiculous result. This version held together surprisingly well, even at those extremes.
That doesn’t mean I recommend maxing out both sliders. It was a stress test, not a recipe. Pulling them back produced a much more subtle result, while still making a meaningful difference to the image.
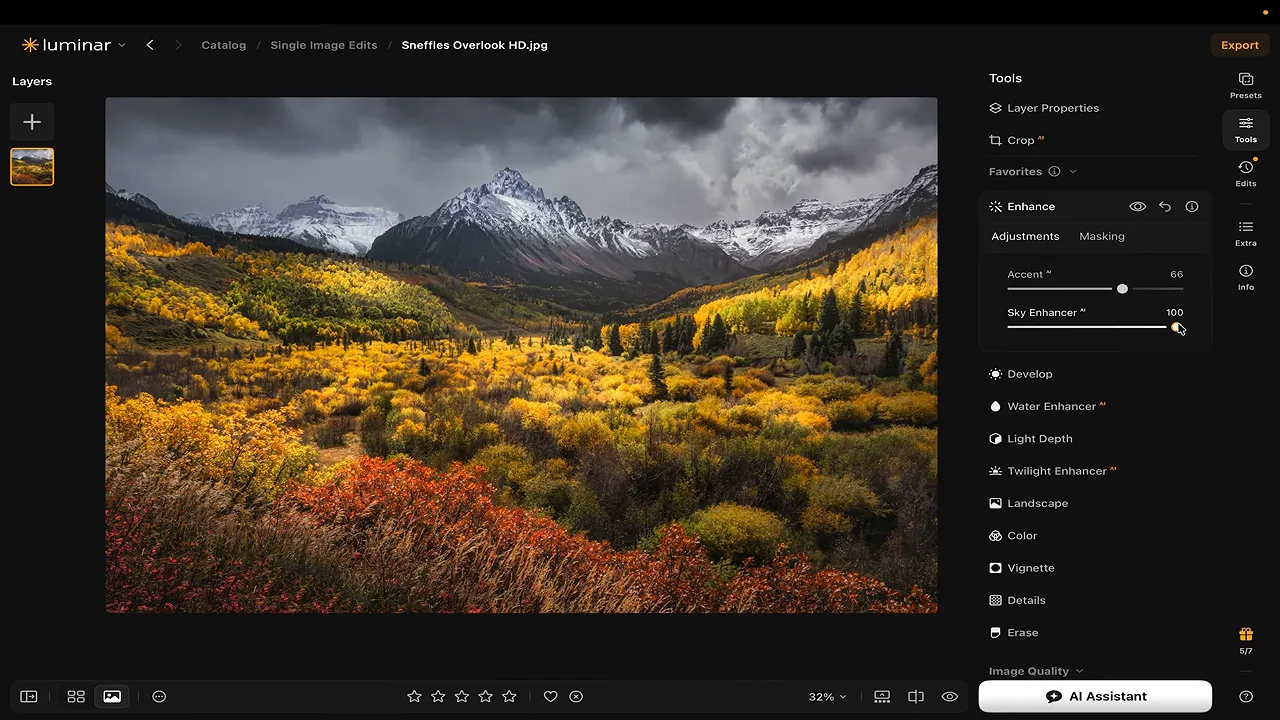
I tried the same thing on a colorful coastal village photograph. At 100 on both sliders, that image did start to look overdone. Bringing the main Enhance adjustment down to around 60 and Sky Enhancer to about 50 gave me a much more manageable result.
Those numbers worked for that particular photograph. The important part is comparing the effect on and off and deciding whether the image still feels right.
The benefit of Enhance hasn’t changed: you can get a lot done with just two sliders. What has changed is how easy it is to keep that quick adjustment from becoming heavy-handed.
Atmosphere 2.0: Control Where the Fog Settles
Atmosphere 2.0 is the standout feature for me. Adding fog is one thing. Being able to position it within the scene, move it behind foreground objects, and control its shape is something else entirely.
My favorite use is also the most restrained: build on atmosphere that was already there when you made the photograph.
I started with a forest stream image from the Smoky Mountains, photographed in spring. There was already a little fog in the background. It was subtle, but it gave me a natural starting point rather than asking the tool to create a completely different mood.
Start with the Fog Type and Amount
In the Landscape section, open Atmosphere. The available types include:
- Wispy Fog: My favorite in these tests, particularly for a softer, more restrained effect.
- Heavy Fog: Another option available when choosing the atmosphere type.
- Ground Fog: Useful in some scenes, though I found it could become overdone fairly quickly.
I selected Wispy Fog for the Smoky Mountains photograph. The initial effect was stronger than I wanted, so the first adjustment was simply to reduce it.
That’s a useful habit with this tool. Get enough fog into the image to understand what it’s doing, then bring the amount back to a level that supports the scene.
Move the Fog Through the Scene
The positioning controls are where things get really interesting. You can shift the fog farther into the scene or bring it toward the foreground. You can also move its placement around using the control in the panel.
In the stream photograph, I paid close attention to a prominent foreground rock. As I moved the fog, it built behind the rock and changed position through the scene rather than simply covering everything with the same pale layer.
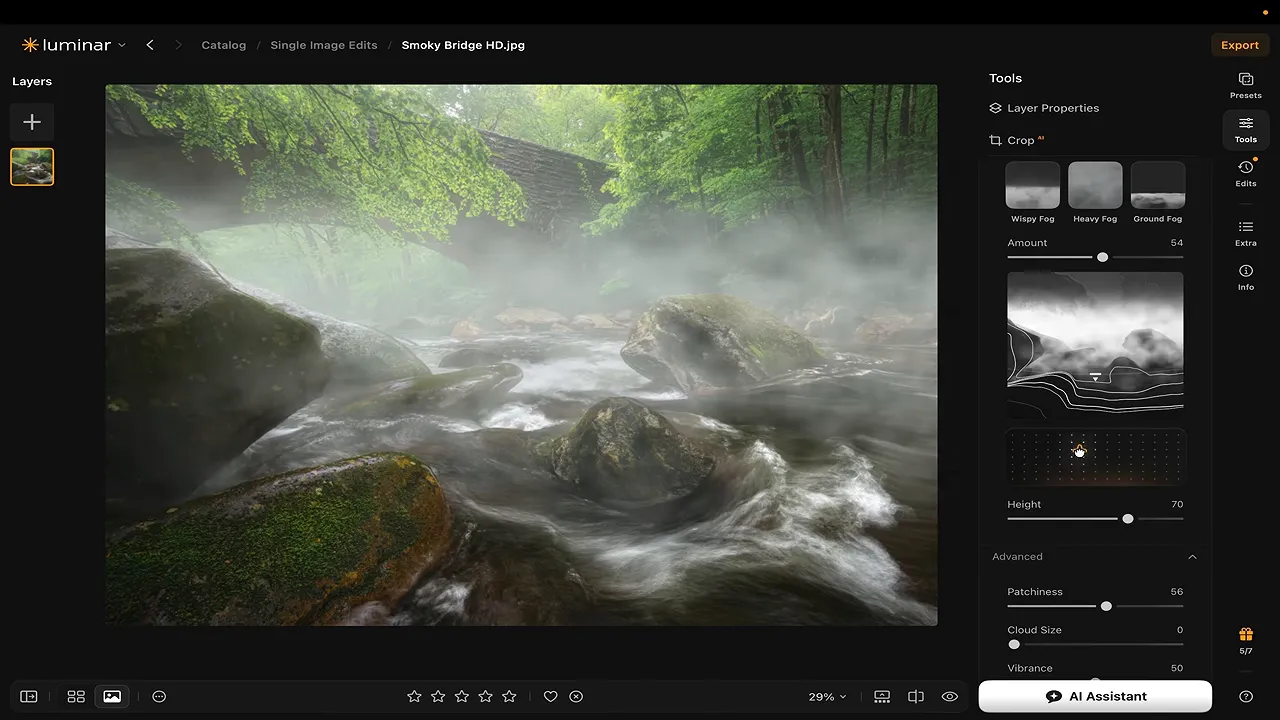
I temporarily increased the amount to make those placement changes easier to judge. Moving it backward and forward revealed how differently the same effect could sit within the photograph. The way it interacted with that foreground rock was pretty wild.
Refine the Height, Patchiness, Size, and Color
Once the fog is in a useful position, several additional controls help shape it:
- Height: Move the fog lower into the scene or lift it higher.
- Patchiness: Lower values create a more uniform appearance, while higher values break the fog into more distinct patches.
- Cloud size: Adjust the size of the fog formations. I preferred a smaller setting in the stream example.
- Vibrance: Increase the vibrancy of the color in the fog.
I didn’t use the Vibrance control much during testing, but its purpose makes sense. When a scene has a strong color cast, fog can take on that color. This control lets you strengthen that aspect of the effect.
For the stream image, I kept moving the fog until I found a placement I liked, then reduced its strength again. Toggling the tool on and off gave me a subtle increase in atmosphere without losing the character of the original scene.
Ground Fog Needs a Lighter Touch
Ground Fog also produced some impressive interactions with the foreground rock. Depending on its placement, it appeared to move around the rock or pass over it.
The control is impressive, but the effect isn’t automatically the right choice. I found Ground Fog could look too strong, so I pulled it back. For these images, Wispy Fog generally gave me a result I preferred.
Testing a Photograph with No Existing Fog
To push Atmosphere 2.0 further, I tried a vertical waterfall photograph that had no fog at all. It also had a complicated foreground and middle ground, with rocks and fallen logs crossing the scene.
With Wispy Fog selected, I moved the effect around and examined how it interacted with those logs. The fog appeared beneath and above a log without simply washing out the log itself. That separation was what impressed me.
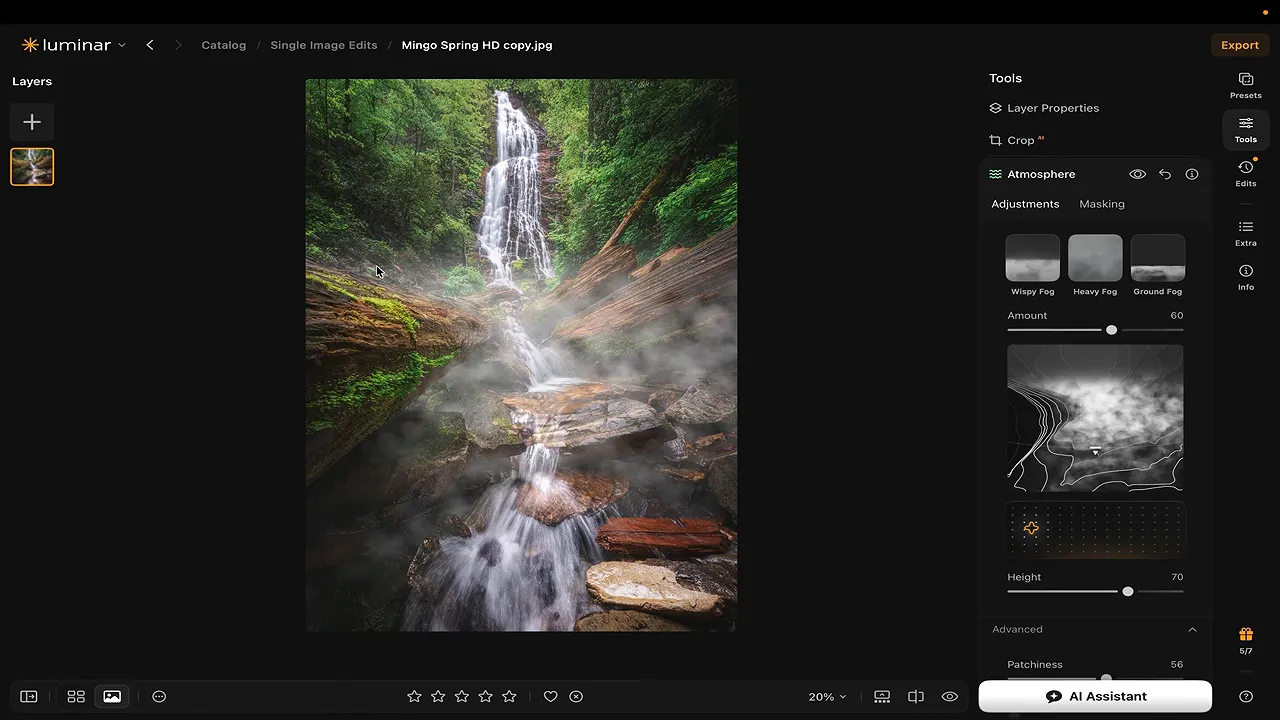
Ground Fog moved around the foreground rocks too, but once again, Wispy Fog was my preference. After dialing it back, the effect became much more manageable.
This test showed what the tool could do with a complex scene. Still, my favorite result came from the photograph with naturally occurring fog. Enhancing an existing mood felt more convincing than introducing one from scratch.
Smart Compositions: A Fresh Look at Familiar Photos
Smart Compositions tackles a different problem: getting locked into the framing you already know.
I tested it on photographs I had already cropped the way I liked. I wasn’t necessarily looking for a replacement. I wanted to find out whether Luminar could suggest a composition I hadn’t thought about.
Inside the Crop tool, Smart Compositions analyzes the image and offers framing suggestions. Selecting one previews the crop immediately, along with the relevant composition overlay. If you like the result, pressing Enter applies it.
The suggestions draw on familiar visual composition principles, but the useful part is seeing them applied to your particular image without manually cycling through every overlay.
Norway: A Golden Triangle Crop I Hadn’t Considered
For a coastal photograph from Norway, Luminar suggested Golden Triangle and Centered crops.
The Golden Triangle option was genuinely interesting. Its diagonal structure connected the foreground rock and a splash of water with the mountain farther back. I hadn’t considered framing the photograph that way.
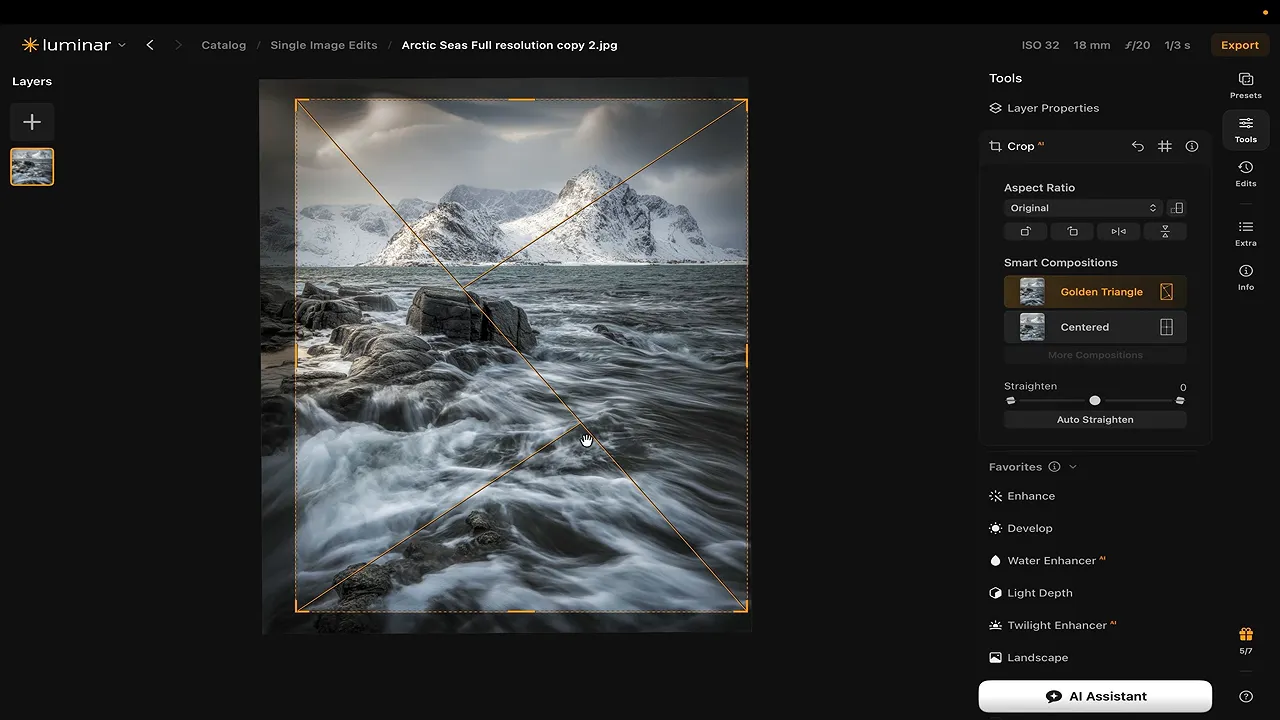
The Centered option made the composition tighter, but I didn’t like it. The Golden Triangle suggestion, on the other hand, was worth applying. It ended up being my favorite Smart Compositions example from the test.
Faroe Islands: A Golden Spiral Leading to the Waterfall
On a waterfall photograph from the Faroe Islands, the tool suggested Golden Spiral and Centered options. The spiral curved through the scene toward the waterfall, which made the recommendation feel relevant to the photograph rather than arbitrary.
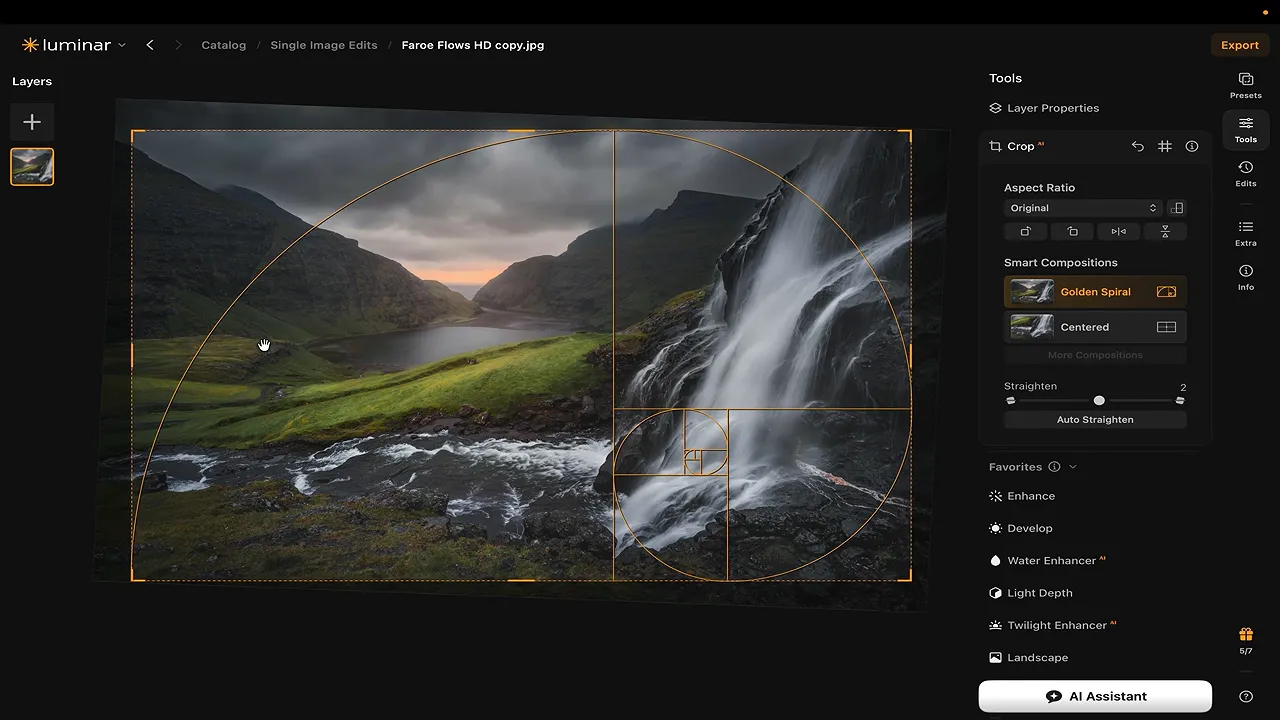
Applying that crop made only a small refinement, but it had a meaningful effect on the framing. Small but mighty is probably the best way to describe it.
Another coastal village photograph received just a Golden Spiral suggestion. A Patagonia landscape received Golden Ratio and Centered suggestions. I thought the Golden Ratio option was okay, but I definitely didn’t prefer the centered crop.
Suggestions, Not Final Decisions
I don’t normally work through every crop overlay when editing a photograph. Smart Compositions makes it quick to consider a couple of alternatives I might otherwise skip.
Not every suggestion was better than my original framing, and that’s fine. The time-saving part is having the software identify possibilities while I decide which one works. It’s a second opinion, not a reason to stop trusting your own judgment.
Which Update Makes the Biggest Difference?
Atmosphere 2.0 impressed me the most because of the control it provides over placement and the way the fog interacts with objects in the scene. Being able to bring out the existing mist in that Smoky Mountains image, while keeping the result natural, made a real difference.
The updated Enhance tool is a quieter improvement, but a useful one. It still makes editing fast, while giving me more room to keep the result subtle. Smart Compositions adds a fresh perspective, especially on photographs whose framing I thought I had already settled.
The common thread is control. These tools are most useful when they help refine a photograph, not when every slider is pushed as far as it can go.
If you’d like to try Luminar’s fall update on your own photos, use code MARKDENNEY at checkout for the extra 10% discount offered with this promotion.


