When I first got into landscape photography, there were a handful of rules I never questioned. Photographers I respected repeated them so often that I assumed they had to be true. So I spent years trying to get better at following them.
Honestly, that probably wasn’t a bad place to start. Rules give you something to focus on when everything is new. But looking through my favorite photographs today, I’ve noticed how many of them completely ignore the advice I once considered essential.
That made me wonder: had I spent too much time following the rules and not enough time questioning them?
These five rules shaped my photography for years. Letting go of them gave me more freedom, and one of them probably caused me to miss more photographs than all the others combined.
Key Takeaways
- Raise ISO when necessary to get the shutter speed your photograph needs.
- Leave a little extra space when framing to preserve cropping flexibility later.
- Choose sharpness and subject placement for depth, balance, and the feeling you want.
- Look for compelling light throughout the day instead of photographing only during golden hour.
1. Always Shoot at ISO 100
Early on, I was convinced that almost nothing could ruin a photograph faster than letting the ISO creep above 100. ISO 200 made me uncomfortable. ISO 800? That felt like asking for trouble.
I still see that hesitation during workshops. People are reluctant to move from ISO 100 to 200, let alone 640, 800, or 1250. I understand it because I had exactly the same mindset.
But keeping that number low isn’t much of a victory if you can’t get the photograph you want.
Choose the ISO that supports the shutter speed you need
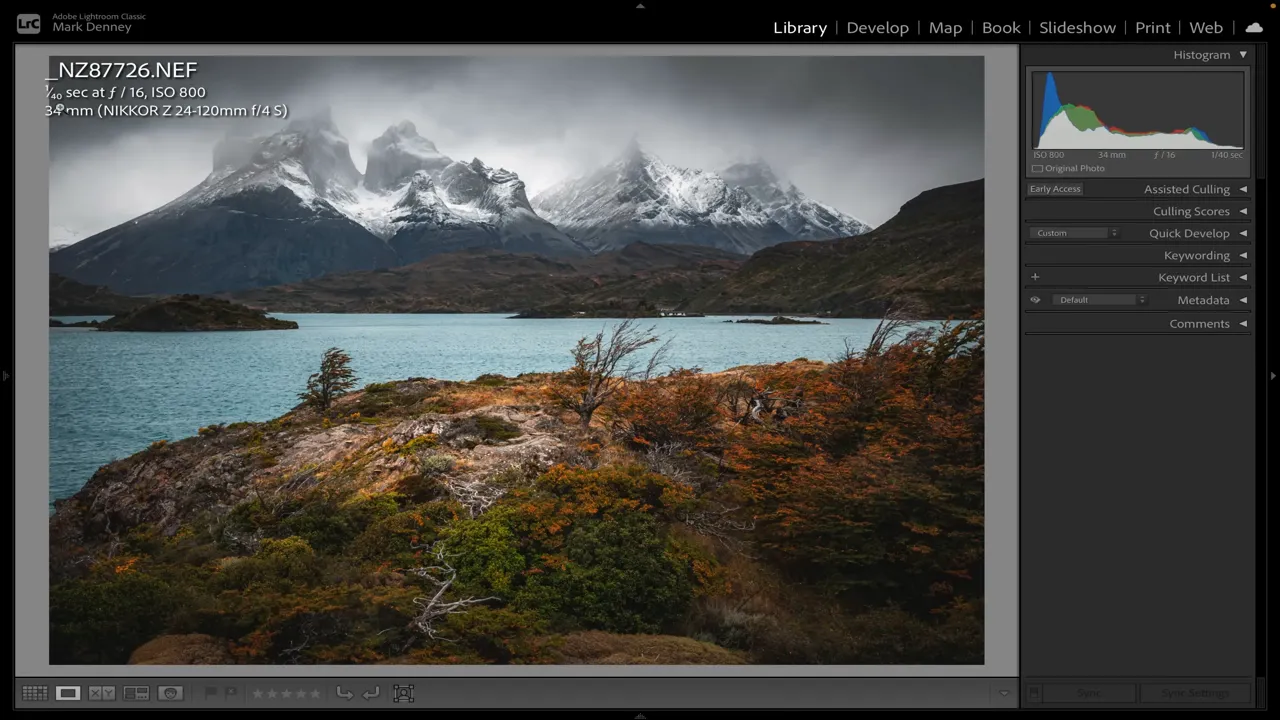
On a recent trip to Patagonia, I made a quick handheld photograph in very windy conditions. The trees were leaning and blowing to the right, and I raised my ISO to 800 to get a shutter speed of 1/40 second.
With in-body image stabilization turned on, I was able to make a sharp photograph. Enlarging the image confirmed that the detail was there. Holding on to ISO 100 would have forced a much slower shutter speed at the same aperture.
Another example came during a winter storm in the Smoky Mountains at sunrise. The trees were blowing around, and I was photographing handheld again. ISO 1250 allowed me to use a shutter speed fast enough to make the image work.
If you refuse to move above ISO 100, something else has to give. At a fixed aperture, you either lengthen the exposure or accept a darker image. A tripod can support the camera during a longer exposure, but it doesn’t stop trees from moving in the wind.
We also have far better noise-reduction tools than we used to. Software such as DxO PureRAW and Lightroom’s Denoise gives us useful options for cleaning up high-ISO photographs.
That doesn’t mean every ISO setting produces identical results. It means fear of noise shouldn’t automatically outweigh the needs of the photograph. Removing that self-imposed ISO limit made a real difference in how freely I could work.
2. Never Crop Your Photographs
I used to spend an incredible amount of time trying to perfect my composition in the field because I believed cropping was something I should never do.
My reasoning was simple: cropping meant losing pixels, losing resolution, and somehow making the whole image fall apart. Looking back, that was a pretty extreme way to think about it.
Almost all of my finished photographs have some amount of cropping. Sometimes it’s a small adjustment, as with a woodland stream photograph that ended up very close to my original framing. Other times it’s a tighter crop, like a winter scene from the Canadian Rockies or a mountain photograph from Patagonia.
The resolution tradeoff exists. But refusing to crop creates another problem: it can leave you with no flexibility when you get home.
Try shooting for the crop
Here’s the important limitation: you can crop inward later, but you can’t recover scene content you never included.
If you frame everything exactly against the edges of your intended composition, you may find that a small change in the digital darkroom is no longer possible without cutting something important out.
I use a simple technique I call “shooting for the crop”:
- Build the composition the way you envision the finished photograph.
- Zoom out a few millimeters to leave a little extra space around the edges.
- Refine the final framing during editing.
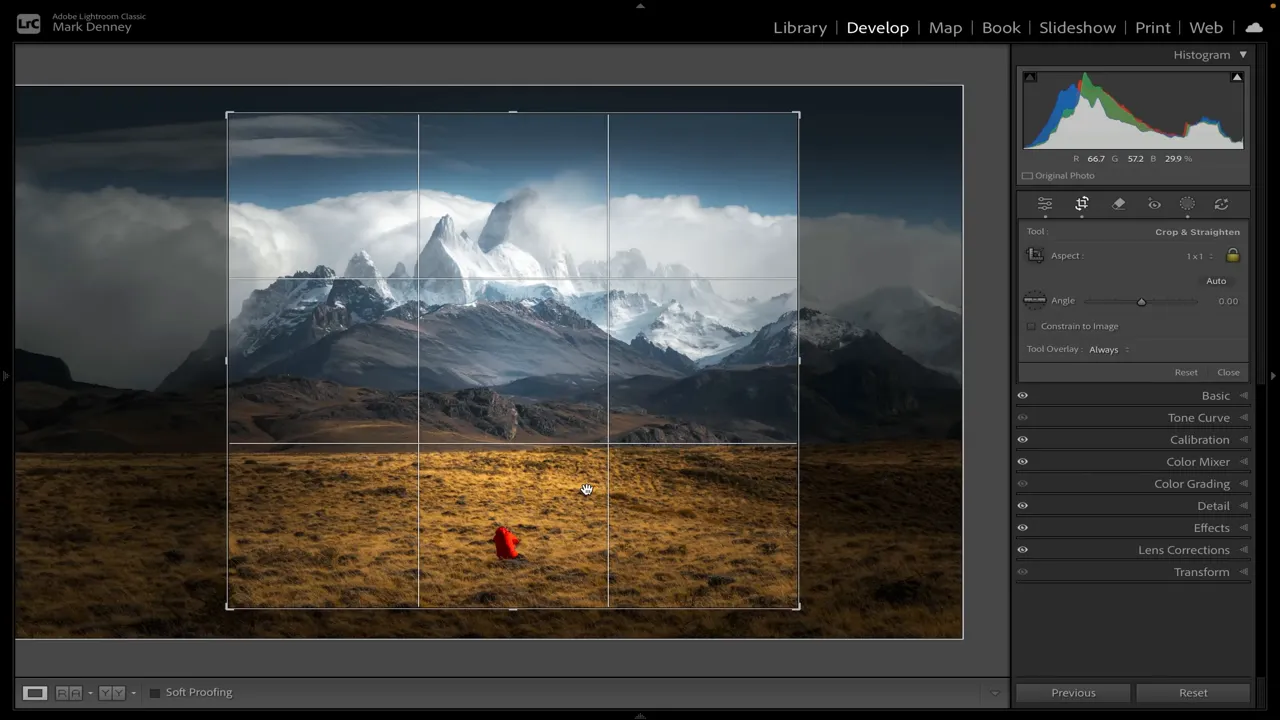
My Patagonia mountain photograph is a good example. I didn’t originally envision it as a square image, but I included enough of the surrounding landscape to give myself that option.
This isn’t about abandoning composition in the field. I still want to make thoughtful decisions on location. I just don’t want those decisions to leave me boxed in before I’ve had a chance to explore the photograph properly.
3. Every Landscape Photo Must Be Sharp from Front to Back
About three or four years into photography, I learned how to focus stack. That’s when I became absolutely obsessed with sharpness.
I wanted every detail in the foreground, midground, and background to be tack sharp. If I could find something slightly soft, I felt like there was more work to do.
I still focus stack sometimes. It’s a useful technique for combining photographs focused at different distances when I want more of a scene to appear sharp. But I no longer think every landscape needs that treatment.
A little softness can create depth
Try holding your hand close to your face and focusing on it. Notice how the background becomes soft. Then shift your focus beyond your hand and notice what happens to your fingers.
It’s a simple reminder that we don’t experience every distance as equally sharp at the same moment. To my eye, a photograph with perfect detail everywhere can sometimes feel a little too clinical or artificial.
In one of my mountain photographs, a rock very close to the lens has beautiful, crisp detail. The distant peaks are slightly softer. That difference doesn’t bother me. I actually prefer it because it helps the background feel farther away.
A stream photograph from the Smoky Mountains has a similar quality. The leaves on the foreground rock are sharp, while the woodland gradually softens into the distance. A little mist contributes to that effect as well.
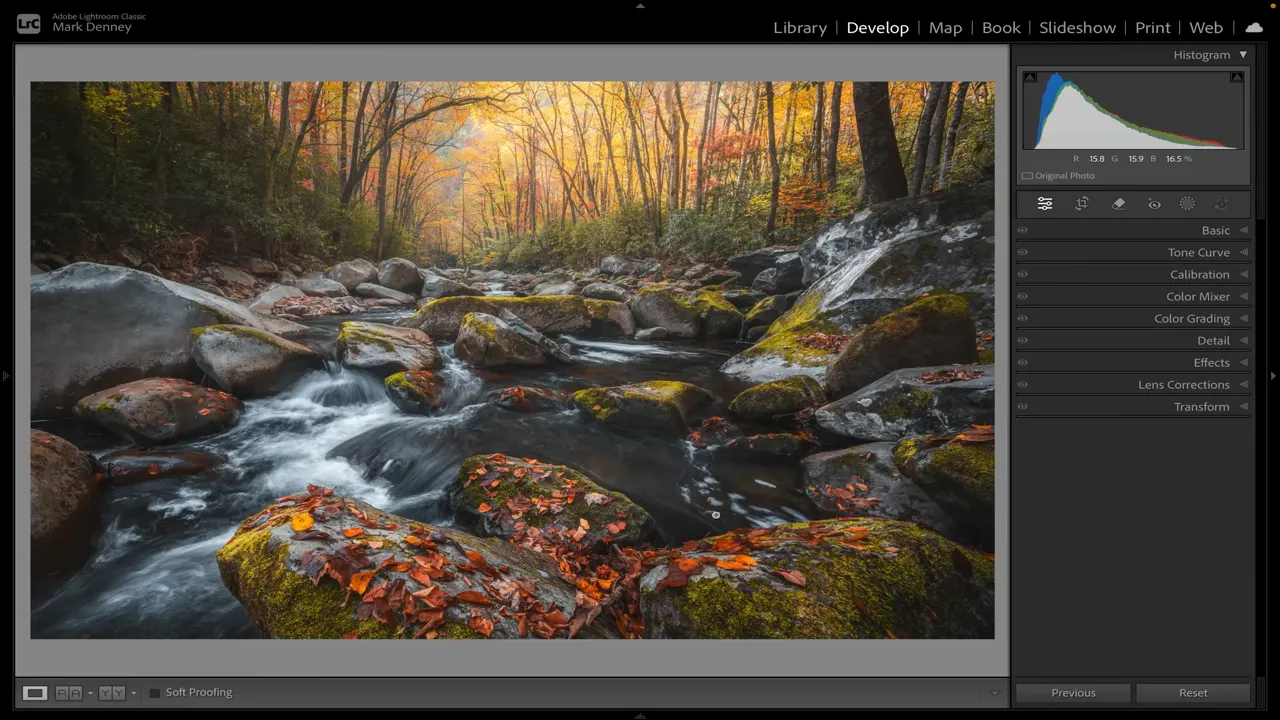
Sharpness is a creative decision, not a requirement that every part of the frame must satisfy equally. Sometimes I want front-to-back detail. Other times, allowing focus to fall off slightly gives the photograph the depth and realism I’m after.
If focus stacking is new to you, I’ve put together a free PDF guide explaining how to do it. Learn the technique so you can choose when to use it, rather than feeling obligated to apply it to every landscape.
4. Never Put Your Subject in the Center
The rule of thirds is another guideline I took much too literally. I thought a strong composition meant keeping the subject away from the middle of the frame.
Over time, I discovered that I absolutely love centered compositions. In fact, there’s one situation where I use them regularly: when the composition has one clear main subject.
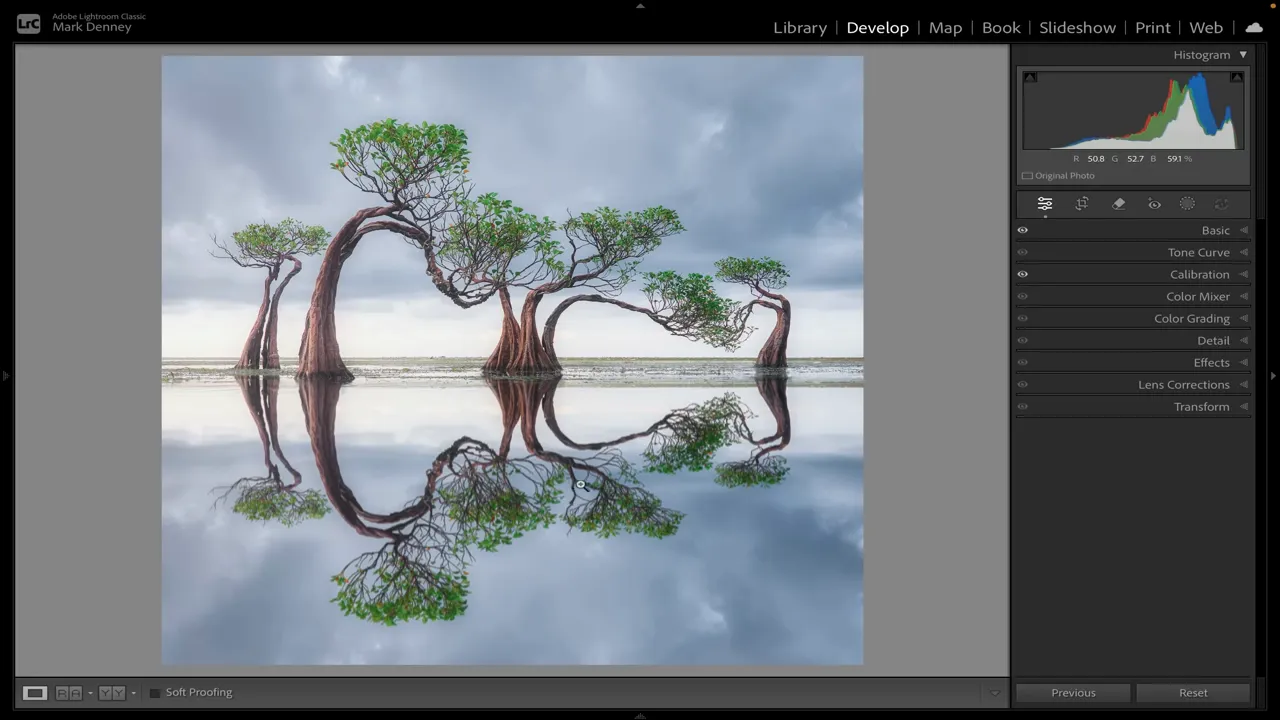
That subject might contain several elements, such as a group of mangrove trees, but it reads as one focal point. When that’s the case, I’ll often place it right in the center.
Some of my favorite examples include:
- Mangrove trees and their reflections off the coast of Indonesia.
- The Golden Gate Bridge framed directly down its center.
- Yosemite Falls surrounded by autumn trees.
- A small red hut on the coast of Norway.
- A lone tree in the Smoky Mountains, wrapped in fog with a sunburst shining through its branches.
These aren’t occasional exceptions buried in my collection. Many of my favorite images use this approach.
Compose for the feeling you want
What I love about a centered subject is the sense of balance and simplicity it can create. Add a reflection, and that feeling can become even stronger.
The mangrove photograph feels harmonious to me. The subject and its reflection settle into the frame in a way that feels peaceful and quiet. Moving the trees off-center simply to satisfy a compositional rule wouldn’t necessarily improve that feeling.
I don’t center every subject. But I no longer avoid the middle, either. I actively look for scenes where a centered composition supports the calm quality I want in the finished photograph.
5. Only Photograph During Golden Hour
This is the rule that probably cost me the most photographs.
For years, I believed sunrise and sunset were the times to make landscape photographs, and everything between them was mostly a gap to fill.
My first trip to Yosemite really illustrates the problem. I went into the park early, photographed, and left. Then I returned in the evening, photographed sunset, and left again.
I was making photographs for perhaps two to two and a half hours total while leaving eight or ten hours in the middle of the day unexplored.
Of course, midday conditions can be difficult. Harsh light and a clear sky don’t always make things easy. But difficult isn’t the same as impossible, and the clock doesn’t tell you everything about the light.
Look at the conditions, not just the time
Some of my favorite photographs were made nowhere near sunrise or sunset:
- The Dolomites in midafternoon: Stormy conditions created dramatic clouds and atmosphere around the peaks.
- Sedona in the afternoon: Beautiful light reached the red rock landscape several hours before sunset, without a storm being involved.
- The Smoky Mountains several hours after sunrise: The sun was already high, but the light filtering through the green woodland was still wonderful.
- The Dolomites later in the afternoon: Peaks emerged from clouds above a small church, creating an opportunity well outside golden hour.
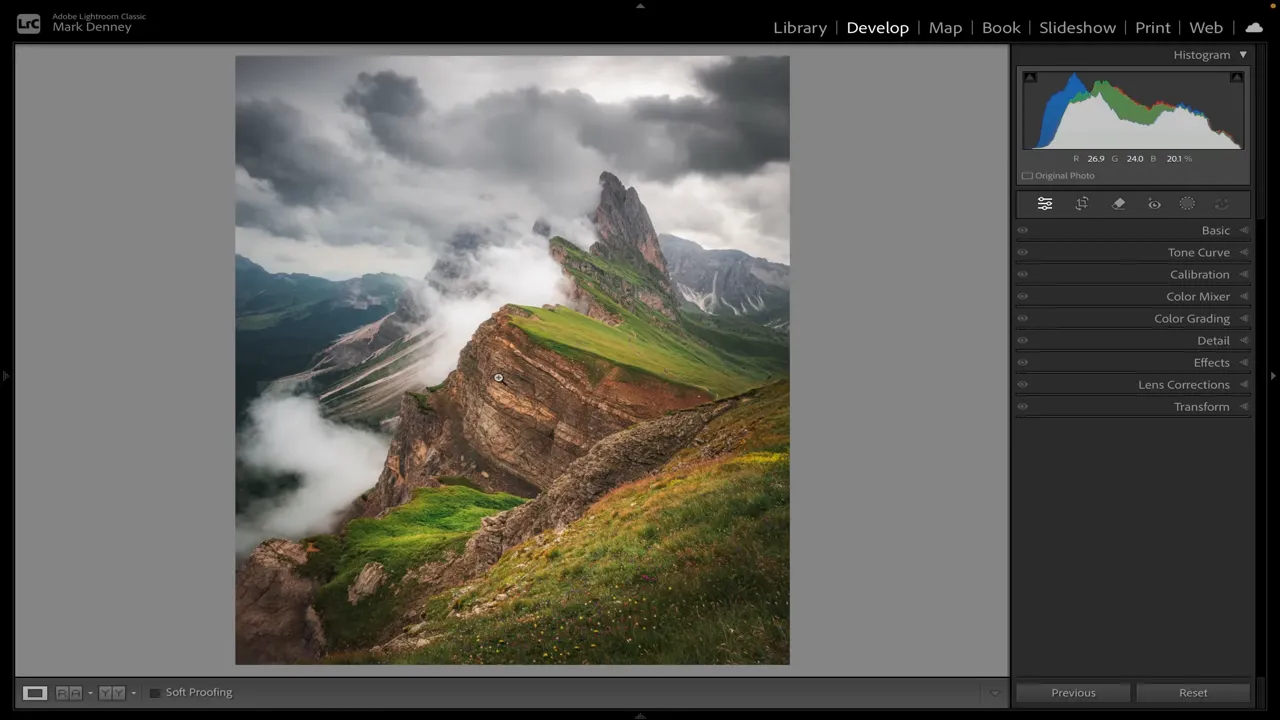
I still appreciate beautiful sunrise and sunset light. The mistake was treating those small windows as the only times worth taking the camera out.
If you aren’t out making photographs, you aren’t giving yourself the opportunity to create something. Once I stopped automatically dismissing the hours between morning and evening, I started finding photographs I would previously have missed entirely.
Use Photography Rules as a Starting Point
None of this means the fundamentals are useless. Low ISO, careful framing, generous depth of field, the rule of thirds, and golden-hour light all have their place.
The problem comes when useful guidelines turn into restrictions you follow without thinking.
I’m much happier choosing an ISO that lets me get the shot, leaving room to crop, allowing a background to soften, centering a subject when it feels right, and staying open to light throughout the day.
When I look back at photographs from a few weeks ago, or from six or seven years ago, so many of my favorites break these rules. That’s a pretty good reminder that the goal isn’t to prove how well I can follow instructions. It’s to make a photograph I’m proud of.


