I recently got back from leading a workshop in the Faroe Islands, and one question kept coming up throughout the week. Waterfalls, mountains, dramatic coastlines, different photographers, different cameras: everyone wanted to know which autofocus point they should be using for landscape photography.
What surprised me wasn't the question. It was realizing how much my answer had changed.
For years, I used the smallest focus point available. More precision had to mean better results, right? But over roughly the past year, I've moved toward a slightly larger autofocus area for most of my landscape photography. It's easier to see, quicker to position, and, in my experience, hasn't made my photographs any less sharp.
The smallest focus point isn't a bad setting. It just doesn't need to be the default for every landscape.
Key Takeaways
- Tiny autofocus points can add unnecessary camera management to everyday landscape photography.
- Wide-area AF small has simplified my workflow without reducing sharpness in my usual landscape scenes.
- Smaller focus points remain useful for obstructions, overlapping subjects, focus stacking, and precise detail selection.
- Choose autofocus area size for the scene's needs rather than following a familiar default.
The Hidden Cost of a Tiny Autofocus Point
The traditional advice sounds perfectly reasonable: use the smallest focus point so you can tell the camera exactly where to focus. That's the advice I followed when I started, largely because that's what everyone else seemed to be doing.
But there's a point of diminishing returns. In many landscape scenes, selecting one tiny detail instead of a slightly broader area doesn't give me a better photograph. It just gives me more camera management.
During the workshop, the biggest challenge often wasn't getting the camera to focus. It was how much attention photographers were spending on autofocus in the first place:
- Searching the LCD for a tiny focus point.
- Moving it from one side of the composition to the other.
- Wondering exactly which little detail to place it on.
- Taking their attention away from the scene to manage the camera.
If you've spent much time photographing outdoors, you've probably lost your focus point on the screen. I certainly have. Bright light makes the LCD harder to see, and a tiny pinpoint box doesn't help.
Once you find it, you still have to move it where you want it. On my Nikon Z8, I can move the point past an edge so it wraps around to the opposite side, but that doesn't solve the basic problem: I'm spending time tracking a little box instead of thinking about the photograph.
My goal with camera settings has always been to get the camera out of my way. I want it to help me see and capture a composition, not become the thing that demands most of my attention.
The Autofocus Area I Use Instead
On the Nikon Z8, my usual choice is now Wide-area AF (S), or wide-area autofocus small.
The name can sound a little confusing because it includes the word “small.” But compared with Pinpoint AF or Single-point AF, it gives me a noticeably larger box to work with.
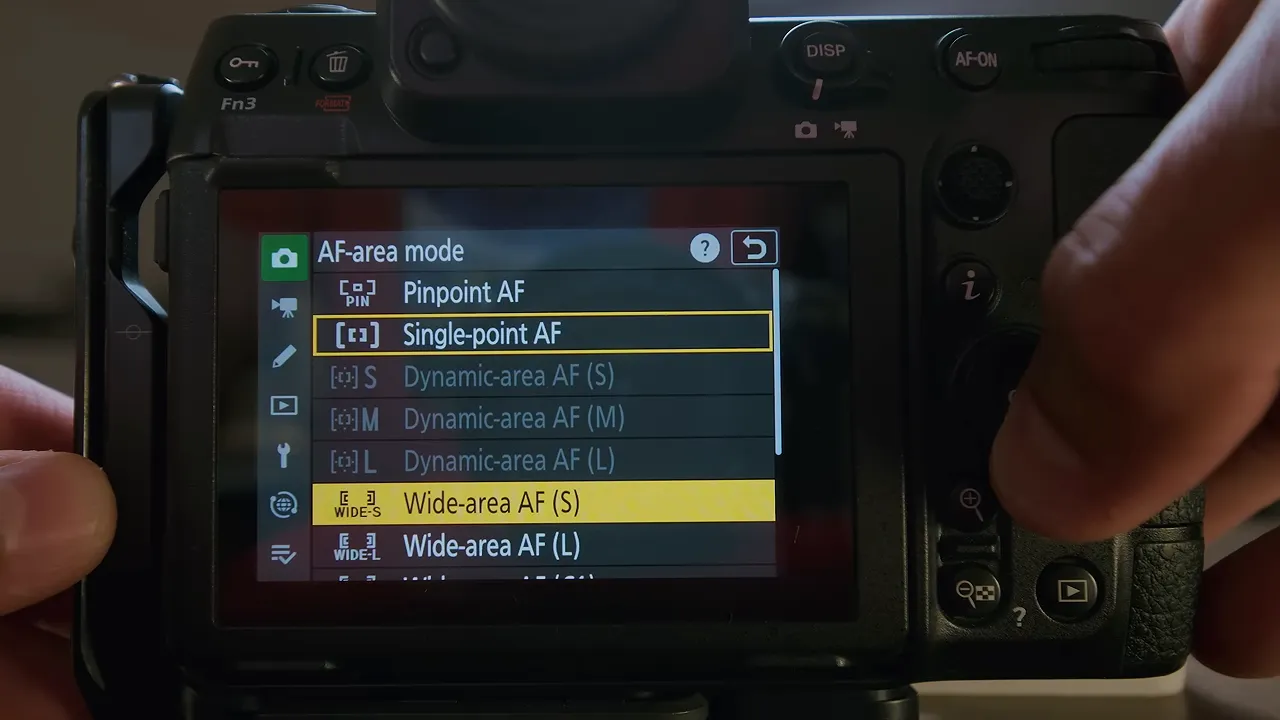
I also tried Wide-area AF (L), which makes the box larger again. For my photography, that feels a little too large. The small wide-area option gives me a useful middle ground: more coverage than a tiny point, without making the selection area broader than I want.
Other cameras use different names and sizes. You might have small, medium, large, or extra-large focus areas rather than Nikon's particular options. The important part isn't matching the label. It's finding a moderately sized autofocus area that suits the scene. For Nikon-specific terminology and controls, the official Z8 reference guide is a useful reference.
Here's the basic change I make:
- Open the camera's AF-area mode settings.
- Choose a modestly larger area instead of the smallest point available.
- Position that area over the part of the scene where you intend to focus.
- Return to a smaller point when the scene requires more precise subject selection.
This isn't about handing the entire composition over to the camera. I'm still choosing where to focus. I'm simply using a box that's easier to work with.
Why a Larger Focus Area Doesn't Have to Mean Less Sharpness
There's an important distinction between precisely selecting a tiny subject and achieving accurate focus. Those aren't always the same problem.
If I'm focusing on a tree, I don't necessarily need to isolate one particular piece of bark. When the area I'm selecting represents the distance I want in focus, a slightly larger box can do the job perfectly well.
Think about distance into the scene, not just left-to-right placement on the screen. Two details can sit on opposite sides of the composition yet be at a similar distance from the camera. By contrast, a nearby branch and a distant mountain can overlap in the frame while requiring very different focus distances.
That distinction matters much more than making the focus box as small as possible.
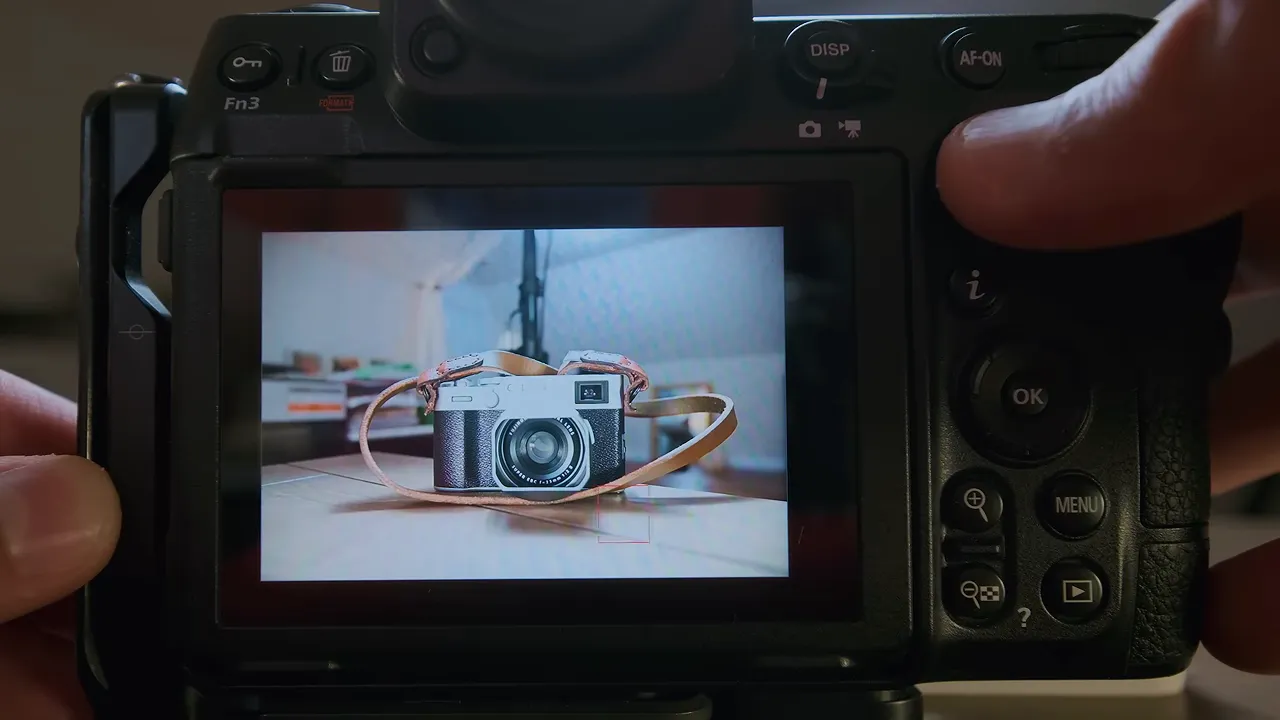
For the landscapes I usually photograph, switching to a slightly larger area has given me three practical benefits:
- Better visibility: I can find the focus area on the rear LCD much more easily.
- Quicker placement: The larger box covers more of the intended area, so positioning it feels less fiddly.
- Less distraction: I spend less time managing autofocus and more time considering the composition.
Most importantly, I haven't seen a loss of sharpness or encountered autofocus problems from making this change in those situations. That's my experience with the scenes I photograph, not a promise that a larger area is the best choice for every subject.
When a Small Focus Point Still Makes Sense
There are absolutely times when I want a smaller focus point. The difference is that I choose it to solve a specific problem, rather than using it out of habit.
Photographing Through Branches
If I'm shooting through branches toward something beyond them, a larger autofocus area may include both the obstruction and the intended subject. A smaller point lets me be more specific about what I want the camera to select.
The reverse can be true, too. Maybe I want the branch sharp and the background out of focus. Either way, the scene calls for more precise targeting.
Separating Overlapping Subjects
When subjects overlap in the composition, a smaller point can help distinguish between them. This is where that extra precision has a clear purpose: it helps me select the intended subject rather than something at a different distance.
Manually Selecting Focus-Stacking Positions
Focus stacking is another situation where I'll use a smaller point. When I'm selecting different focus positions through a series of photographs, I want those choices to be deliberate and accurate.
It doesn't necessarily need to be the absolute smallest pinpoint option. A smaller area is simply helpful for targeting each intended part of the scene.
That said, I rarely focus stack. About 99% of my photographs are captured as a single image, so it doesn't make sense for me to build my everyday autofocus setup around an occasional technique.
Macro Photography
Macro is another obvious candidate for a small focus point because selecting a very specific detail can be important. I don't really do macro photography, so this isn't a recommendation based on my own regular macro workflow. It's simply a situation where precise targeting makes much more sense than it does in many of my broader landscapes.
Choose the Setting for the Scene, Not the Habit
Photographers are creatures of habit. We see other people using a setting, assume it must be the best option, and keep using it without asking whether it actually helps our photography.
That's exactly what I did with tiny focus points. They weren't giving me bad results, but they were asking for more attention than most of my landscapes required.
The useful question isn't, “Which focus point is the most precise?” It's, “How much precision does this particular scene need?”
If you're working through branches, separating overlapping subjects, or choosing positions for a focus stack, a smaller point earns its place. For many other landscapes, a slightly larger area may give you the same result with less effort.
That's the real benefit for me. Less time searching for a box on the LCD means more attention available for the scene in front of the lens. And that's where I want my attention to be.
|