I can’t tell you how many times I’ve gotten home from a trip, opened a photograph I was excited about, and immediately spotted something I should have noticed in the field. A branch creeping into a corner. A focus point that missed just a little. Two rocks touching in a way that suddenly becomes impossible to ignore.
The frustrating part is how small these problems usually are. After teaching landscape photography workshops for the past decade, I’ve learned that disappointing photographs aren’t always the result of poor gear, weak compositions, or a lack of technical knowledge. Sometimes, the difference between an image I love and one that bothers me is an adjustment that would have taken five seconds.
That’s why I use a simple landscape photography checklist. It doesn’t require special equipment. It’s a quick mental routine that reminds me to look harder before pressing the shutter, check the result, and stay engaged before moving on.
Key Takeaways
- Scan frame edges for distractions and give important subjects enough breathing room.
- Enlarge your photographs to confirm sharpness and identify scenes that need focus stacking.
- Explore different camera positions, focal lengths, and orientations before settling on a composition.
- Stay engaged a little longer instead of assuming you’ve already captured the best moment.
Table of Contents
- 1. Scan the Edges and Corners of the Frame
- 2. Ask Whether You’ve Moved Your Feet
- 3. Zoom In and Check That the Important Details Are Sharp
- 4. Decide Whether the Scene Needs Focus Stacking
- 5. Look for Distractions and Unwanted Overlaps
- 6. Try a Substantially Different Focal Length
- 7. Photograph Both Horizontal and Vertical Compositions
- 8. Before Packing Up, Ask Whether You Should Wait Another Minute
- The Real Point of the 10-Second Checklist
- Sponsor Note: Squarespace
1. Scan the Edges and Corners of the Frame
The first thing I check is the perimeter of the photograph. It’s one of the most common problems I see during workshops, and it’s something I still have to remind myself to do.
When you’re excited about a waterfall, a mountain, or beautiful light, your attention naturally goes to the main subject. Meanwhile, a distracting rock or branch can slip into the frame without getting much consideration.
In one waterfall composition, I knew there was a rock near the bottom of the frame. Initially, I thought I could make it part of the image. After scanning the edges, though, I realized it wasn’t contributing anything. It was simply a distraction. Taking a couple of steps forward cleaned up the foreground and gave me a version I liked much better.
But clean edges aren’t only about removing things that stick into the photograph. They’re also about giving important elements enough breathing room.
- In a coastal photograph, a little curve in the foreground sat almost directly against the bottom edge.
- In an older image from Acadia National Park, a foreground rock had almost no space between it and the side of the frame.
- In a photograph from Hawaii, a palm tree was squeezed too close to the edge.
In each case, the framing felt tight and claustrophobic rather than intentional. The elements belonged in the photograph, but their placement made the composition feel uncomfortable.
Before you settle on a frame, run your eyes around all four sides and corners. Look for intrusions, but also ask whether the subjects you want to keep have enough room.
2. Ask Whether You’ve Moved Your Feet
The first composition you find is not necessarily the best one. I regularly have to ask myself whether I’ve actually explored the scene or simply stopped at the first position that looked good.
At a waterfall in Iceland, my initial composition included patches of green leading toward the falls. I liked it. It was a perfectly reasonable place to start.
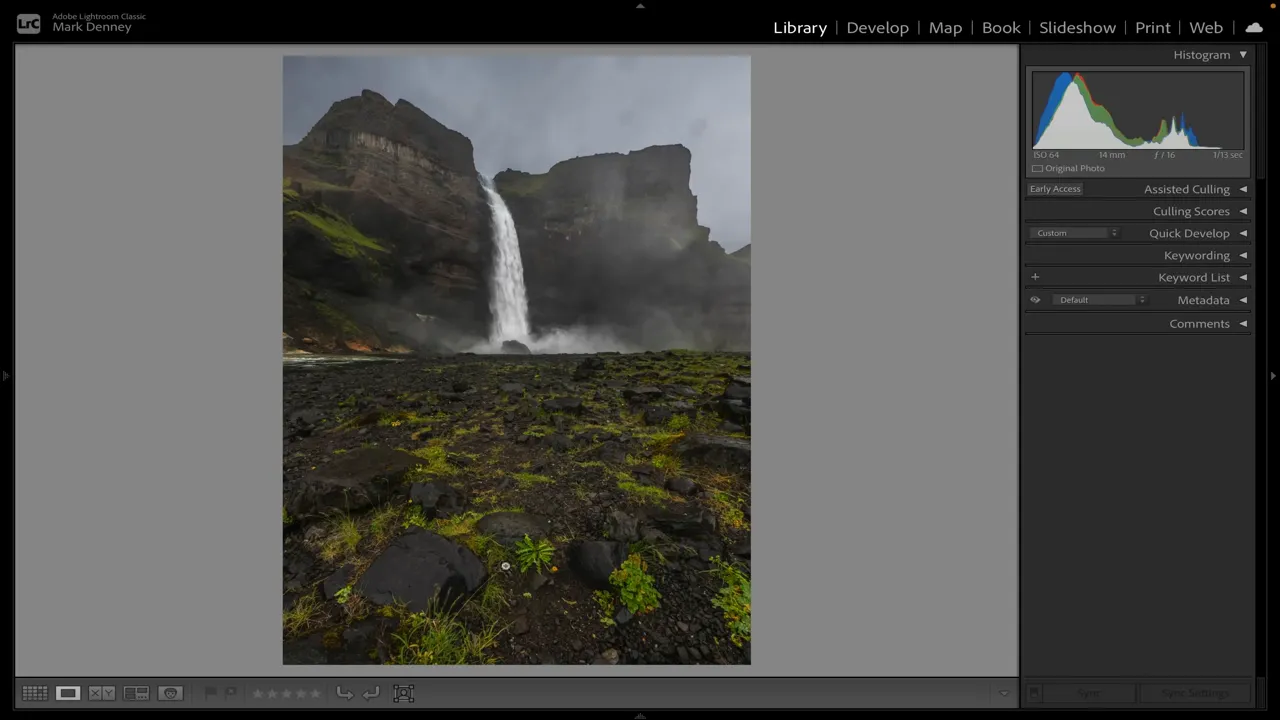
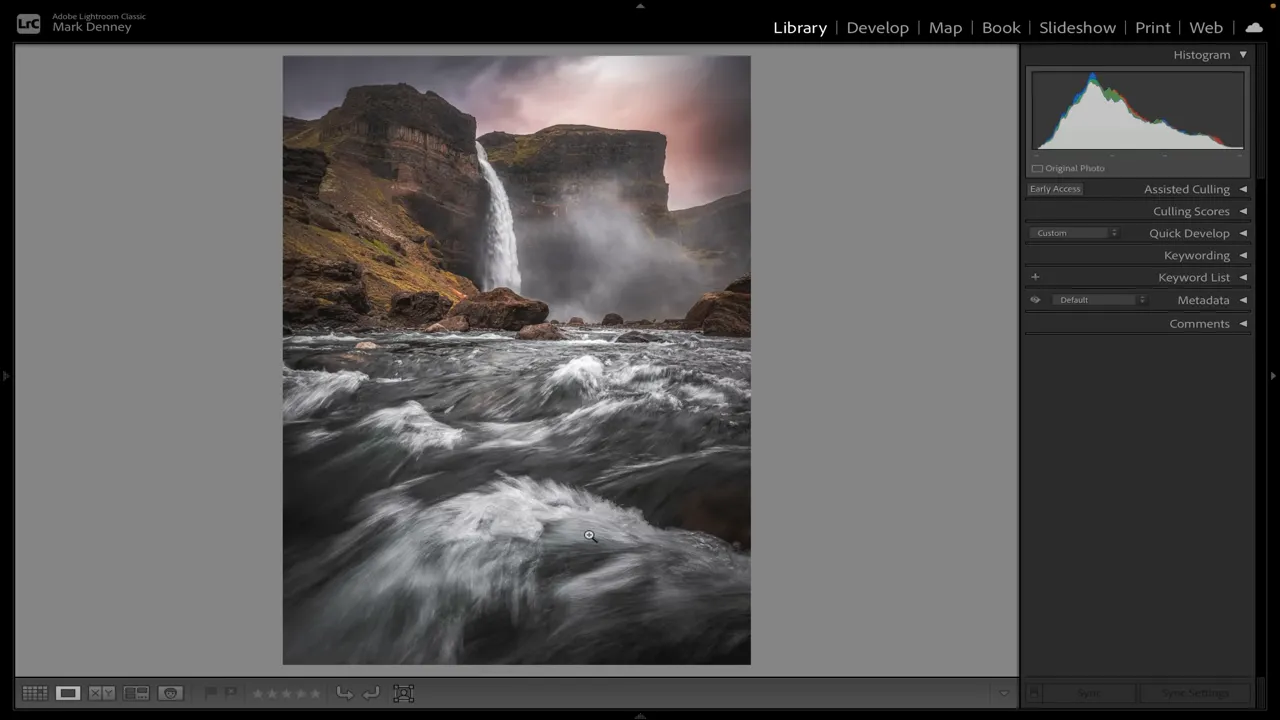
Then I asked whether there was a stronger way to photograph it. I moved roughly 50 feet to the left, closer to the river, and made a much more dynamic composition. The first image felt quiet. The river version felt powerful, with the water playing a much stronger role in the foreground.
Another example came from a popular location in Iceland’s Highlands. I started with the classic view over the river and waterfalls, then stepped back from the cliff edge. That small change revealed more of the river’s curve and brought a foreground element into the composition, adding dimension.
The important part isn’t moving a particular distance. It’s remembering to question your position:
- Would this look better a few feet to the left?
- What changes if I move to the right?
- Could stepping back reveal a stronger foreground?
- Have I explored beyond my first idea?
Treat your first composition as a starting point, not a final answer.
3. Zoom In and Check That the Important Details Are Sharp
A photograph can look great on the back of the camera and still be disappointingly soft. I learned that lesson with a photograph of a beautiful peak surrounded by atmosphere in Patagonia.
It was very windy, and the image looked fine at the normal playback size. Unfortunately, it was the only photograph I made of that moment. Once I got home and enlarged it, I could see that the peak was slightly out of focus. At a distance, it still looked okay. Up close, the softness was obvious, and I didn’t have another frame to fall back on.
Now, as I work a composition, I make a photograph and enlarge it on the camera’s LCD. I want to confirm that the key element really is sharp, rather than assuming it is because the small preview looks good.
Don’t confuse a good-looking preview with confirmed sharpness. The point of enlarging the image is to catch a problem while you still have the opportunity to make another photograph.
4. Decide Whether the Scene Needs Focus Stacking
Checking sharpness goes beyond the main subject. Sometimes the subject is sharp, but the foreground is soft. Other times, the foreground looks beautiful and the background doesn’t hold up.
That’s when I ask whether the scene needs to be focus stacked.
I photographed a snowy scene with wonderful texture in a close foreground snowbank and a cabin in the distance. I loved the detail in the snow, but when I enlarged the background, the cabin was soft. That cabin was a key part of the composition, so its sharpness mattered just as much as the foreground texture.
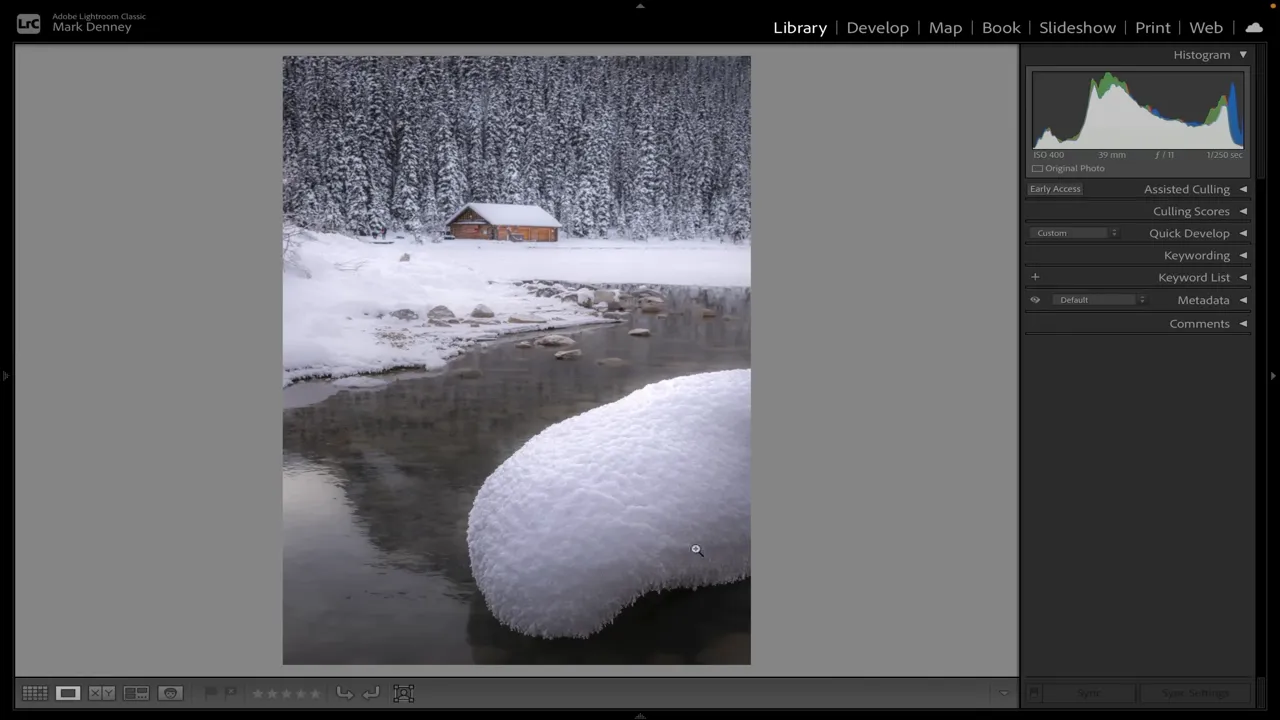
For that particular composition, even stopping down to f/16 or f/18 wasn’t enough to make both areas tack sharp in one photograph. I needed focus stacking, which combines photographs focused at different distances into an image with a greater range of sharp detail. Adobe’s guide to focus stacking provides additional context on the technique.
The essential field decision comes first, though: check the foreground and background separately. If I had judged that snowy scene only from the full-image preview, I could easily have decided everything looked good and moved on.
Enlarging different parts of the photograph told me I needed to capture more before leaving.
5. Look for Distractions and Unwanted Overlaps
I absolutely love composition, and this is one of the checks I pay the most attention to: are important elements overlapping in a distracting way?
Two objects can be physically far apart but appear to touch from the camera’s position. Once I notice that kind of contact, it can become the only thing I see.
Check Where Subjects Meet the Background
One of my favorite autumn photographs from the Dolomites includes a small bridge beside a lake. I paid attention to getting separation around the sides of the bridge, but I missed the top of it touching the far shoreline.
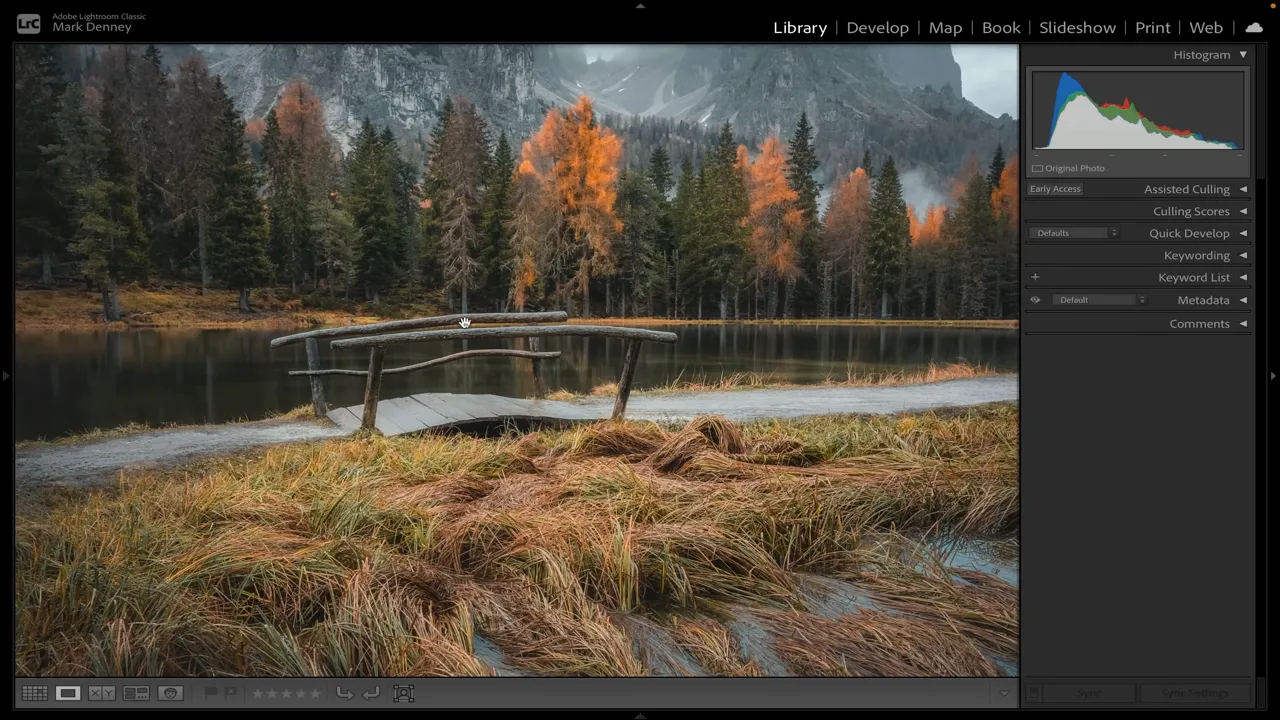
Raising my tripod by about a foot would have separated those elements. It was a small adjustment, but it would have solved something that still bothers me about an otherwise favorite image.
I have similar examples from other locations:
- Nusa Penida, Indonesia: a tree branch touches the roof of a treehouse.
- The Oregon coast: a lighthouse overlaps the land behind it instead of standing clearly apart. Moving a few feet left could have created separation.
- A forest stream: one rock appears to touch another, creating an awkward connection in the composition.
Recheck Separation When Conditions Change
The stream photograph is particularly frustrating because I love the fog and atmosphere. I had photographed the scene the previous day and managed to separate the rocks. After heavy rain, the water was higher, so I photographed it from farther back. That changed the alignment, and the rocks ended up touching.
It’s a good reminder that a composition doesn’t stay solved just because you’ve photographed it before. When your camera position changes, the relationships between objects change too.
Look beyond whether the individual subjects are attractive. Check how their outlines interact with everything behind and beside them. Then give the edges another glance for stray branches or other intrusions.
6. Try a Substantially Different Focal Length
Once I find a composition I like, I ask whether I’ve tried a different focal length. Not a tiny adjustment, but something meaningfully different.
That doesn’t necessarily mean changing lenses. A zoom lens may give you plenty of room to experiment. The point is to avoid getting locked into the idea that a scene must be photographed wide, at a mid-range focal length, or with a telephoto.
In Colorado, I made a photograph of a hillside covered in golden autumn trees. I liked the broader scene, but a tighter composition among the trunks became the version I loved.
In the Dolomites, the process worked in the opposite direction. I began with a telephoto photograph of atmosphere moving around a mountain peak. Switching to a wider focal length gave me another composition I really enjoyed. Both photographs worked, but they showed different aspects of the same landscape.
And in the Smoky Mountains, I started with a mid-range composition of a tree surrounded by patches of red and burgundy. Then I used my 100 to 400mm lens at roughly 350mm, and the tighter photograph instantly became my favorite.
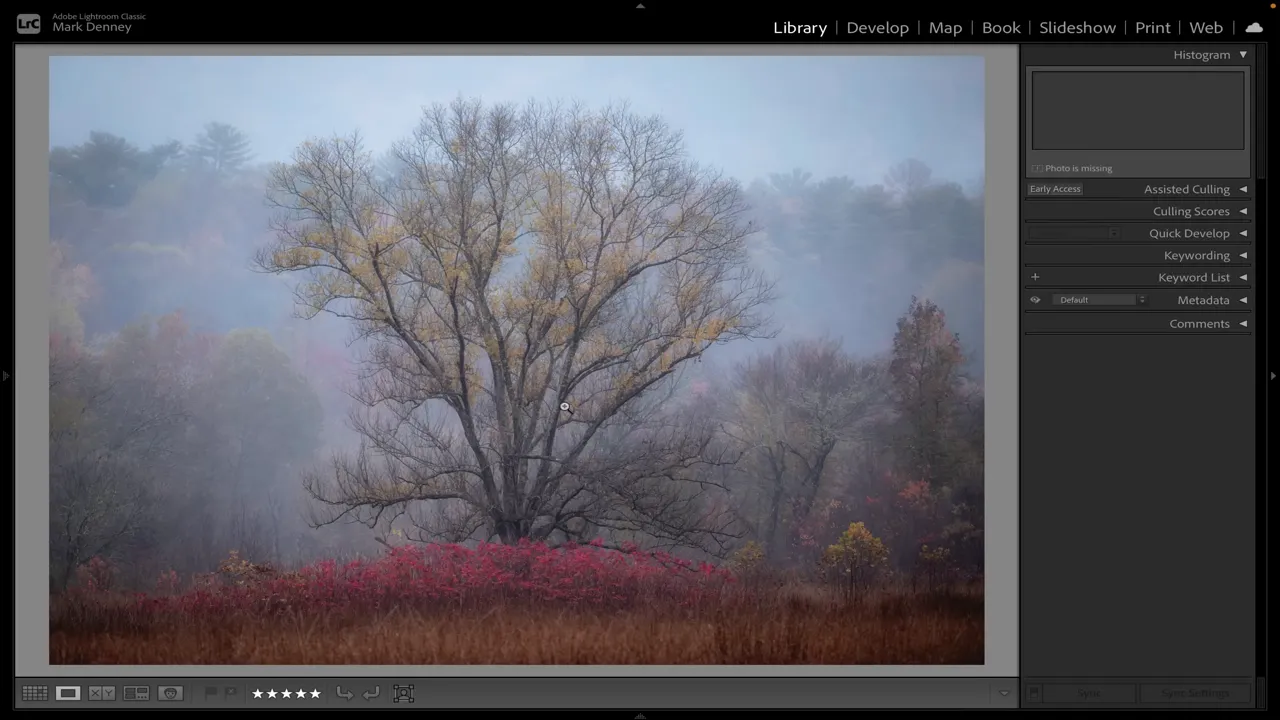
It wasn’t simply that the tree was larger. I loved the compressed, layered feeling of that version compared with the wider composition.
You don’t have to reject the first image to discover another strong one. Experimenting gives you variety, and that variety has made a real difference in my own landscape photography.
7. Photograph Both Horizontal and Vertical Compositions
I usually begin with a horizontal composition, but I make a point of turning the camera vertically as well. This has been one of the most beneficial habits in my photography, and it’s something I teach in workshops all the time.
It’s easy to get locked into one orientation and keep making variations of essentially the same image. Turning the camera forces you to reconsider the composition.
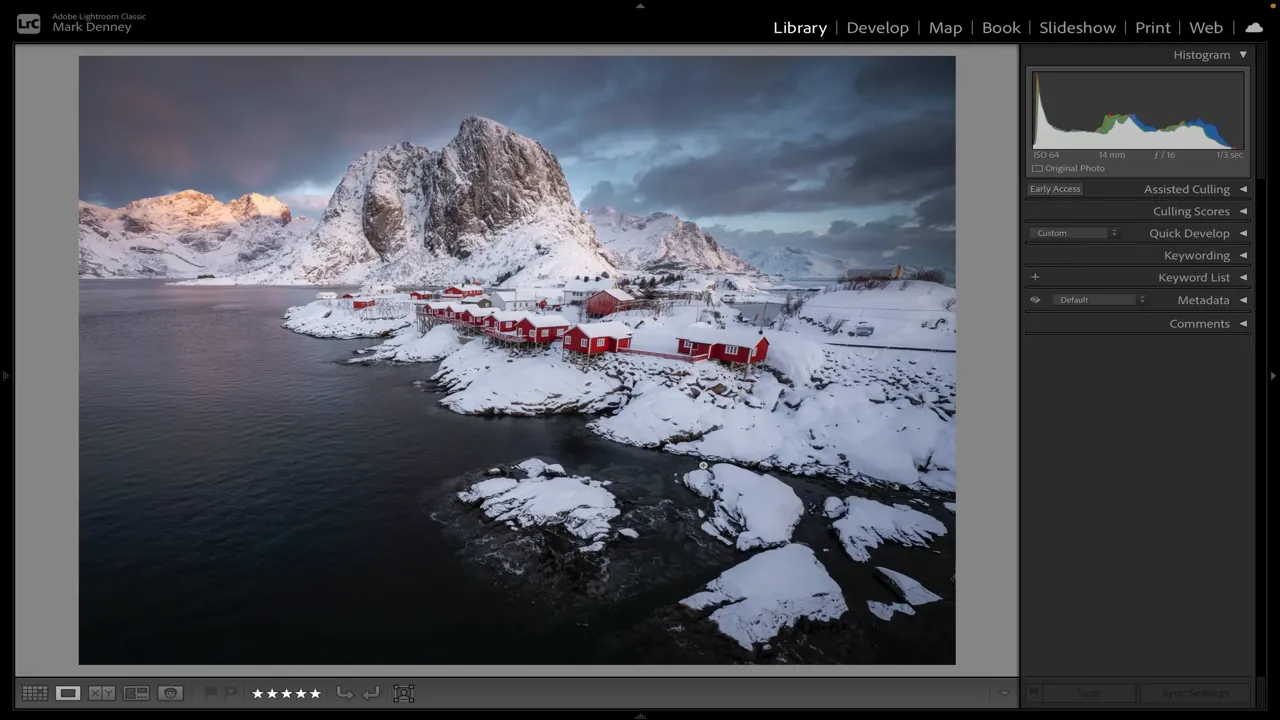
A snowy scene in Norway is a great example. I love the classic horizontal version, with the mountain, red buildings, and snow-covered shoreline spread across the frame.
But I also love the vertical version, which gives the shoreline and foreground a different role.
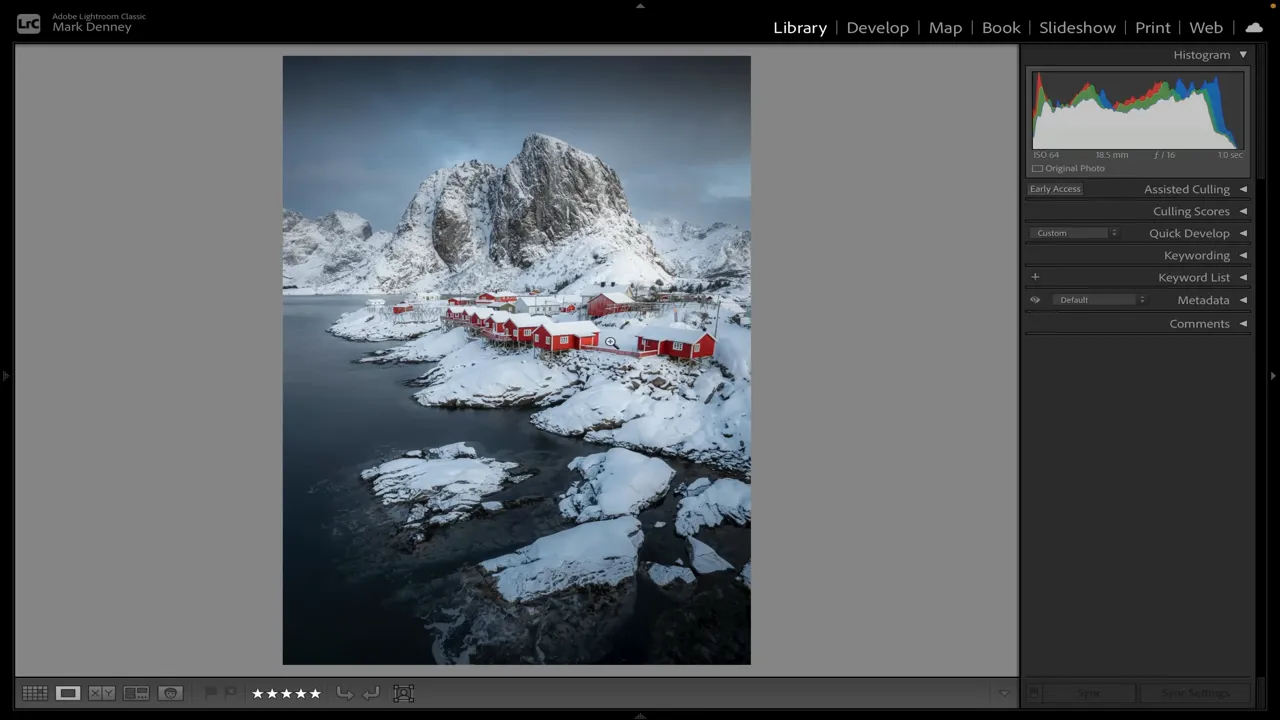
I don’t have to decide on location which one is best. I can bring both home, edit both, and figure out how I feel about them later.
The same has been true of other snowy scenes in Norway and a photograph of a small building above a river in Colorado. A different orientation can create a completely different feeling, even when the subject stays the same.
It takes very little time to try. If it doesn’t work, no problem. But if you never make the alternate composition, you don’t get that choice later.
8. Before Packing Up, Ask Whether You Should Wait Another Minute
The last question is less about the camera and more about patience: should I wait another minute?
This happens to me most often after sunset. I love blue hour, particularly the quality of the light and the colors that can develop in the sky. Sometimes I’m convinced the color has peaked, and I start thinking about packing up.
That’s when I remind myself to stay a little longer.
Sometimes nothing happens. The color fades, it gets dark, and that’s the end of it. But a few extra minutes can also be the difference between leaving with a good photograph and being there for the best light.
You’ve already traveled to the location. You’ve found your composition and set everything up. Don’t rush away simply because you think the best moment has probably passed.
The Real Point of the 10-Second Checklist
The quick questions are simple: check the edges, reconsider your position, confirm sharpness, assess focus stacking, look for overlaps, try another focal length, change orientation, and consider waiting.
Running through those prompts is quick. Following through might mean moving the tripod, making another photograph, or staying a few more minutes. That’s time well spent.
I put the routine into a free PDF called the 10-Second Landscape Photography Checklist. It’s designed to save on your phone so you can reference it easily while you’re out on location.
But the checklist itself isn’t really the point. The point is creating a habit of slowing down and paying attention.
The photographers who consistently come home with great images aren’t necessarily the ones with the best gear or the most experience. Often, they’re the ones who stay engaged a little longer. They explore another position. They look a little harder. They don’t assume their first composition is their strongest.
When I think about the photographs I’m most proud of, very few came from doing something extraordinary. Most came from noticing something I could easily have overlooked.
Sponsor Note: Squarespace
Thanks to Squarespace for sponsoring this lesson. I use it for my website and e-commerce needs. Its Blueprint AI design system helps with building a photography website, while built-in SEO tools and online store features support showcasing work and selling physical goods, digital content, or services. The Squarespace sponsor offer includes a free trial and 10% off your first purchase of a website or domain.


