Making mistakes is one of the best ways I know to learn photography. The problem is repeating a mistake because you haven't recognized it yet.
That's exactly what happened when I first got into landscape photography. I didn't study photography or the visual arts in school. I taught myself through books, magazines, online tutorials, and a lot of trial and error. For the first couple of years, though, I kept doing things that held me back without realizing they were problems.
These are the five biggest beginner landscape photography mistakes I made, plus one bonus mistake that affected my editing for far too long. They aren't ranked by importance. Each one changed the way I approached making photographs once I understood how to fix it.
Key Takeaways
- Clear subjects, fewer distractions, and intentional depth make landscape compositions easier to understand.
- Use the meter and histogram to make deliberate exposure choices and protect important highlights.
- Prioritize promising light and practical experience rather than assuming better gear will improve your photographs.
- Explore camera positions before setting up the tripod, and shoot RAW if you plan to edit.
Table of Contents
- 1. Creating Flat, Confusing Compositions
- 2. Ignoring the Light Meter and Histogram
- 3. Underestimating the Time of Day
- 4. Spending Too Much Time and Money on Gear
- 5. Photographing Everything at Eye Level
- Bonus Mistake: Editing JPEGs Instead of Shooting RAW
- Recognize the Mistake, Then Change the Habit
1. Creating Flat, Confusing Compositions
My biggest composition problem had two parts: photographs without a clear subject and photographs without a sense of depth. A beautiful location doesn't automatically solve either one.
Give the photograph a clear subject
I used to make photographs that felt more like snapshots. There might be several interesting things in the frame, but nothing told your eye where to settle. You could look around the whole image and still wonder why I took it.
One photograph from 2015 is a perfect example. I was incredibly proud of it because I'd finally slowed my shutter speed enough to smooth the water. At the time, that technical achievement was all I could see.
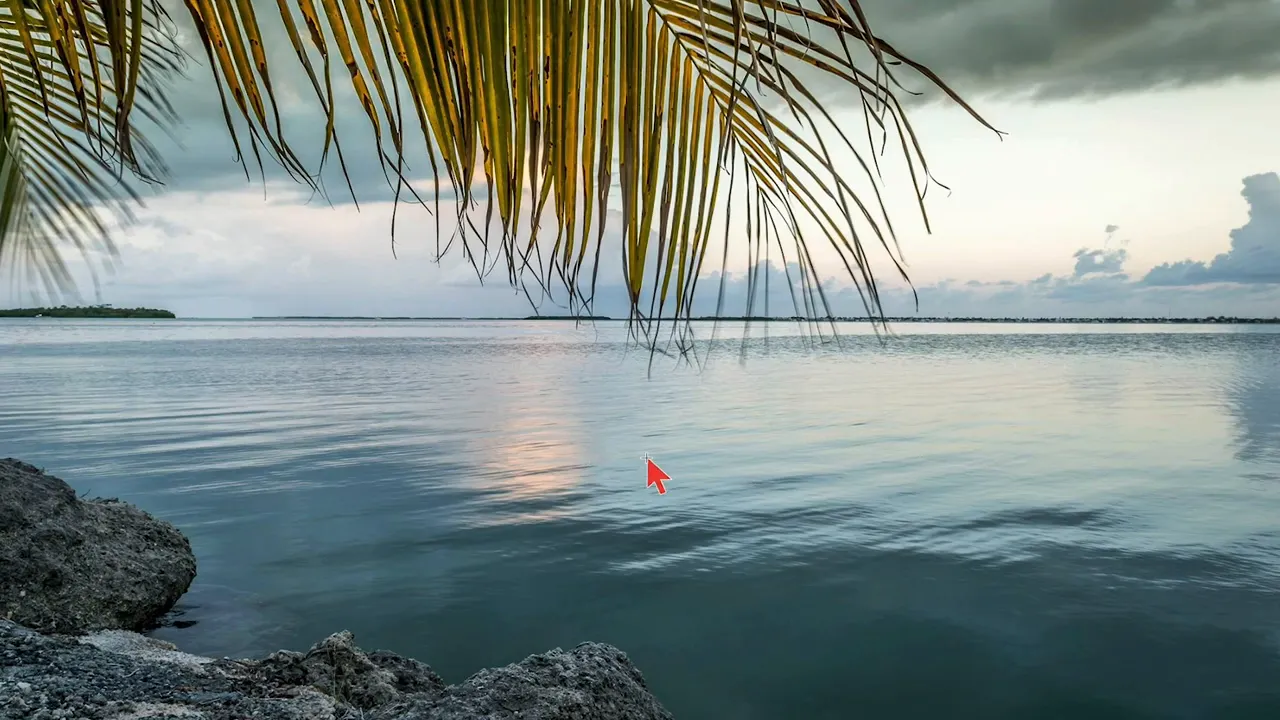
Looking at it now, I can't confidently identify the subject. Is it the rock, the distant island, the palm frond, or the little bit of sunset color? Each element is present, but none gives the photograph a clear purpose.
Compare that with a boardwalk leading toward a lighthouse. The boardwalk gives your eye a route through the photograph, and the lighthouse gives it a destination. The colorful sky, vegetation, and small buildings still matter, but they support the main idea instead of competing with it.
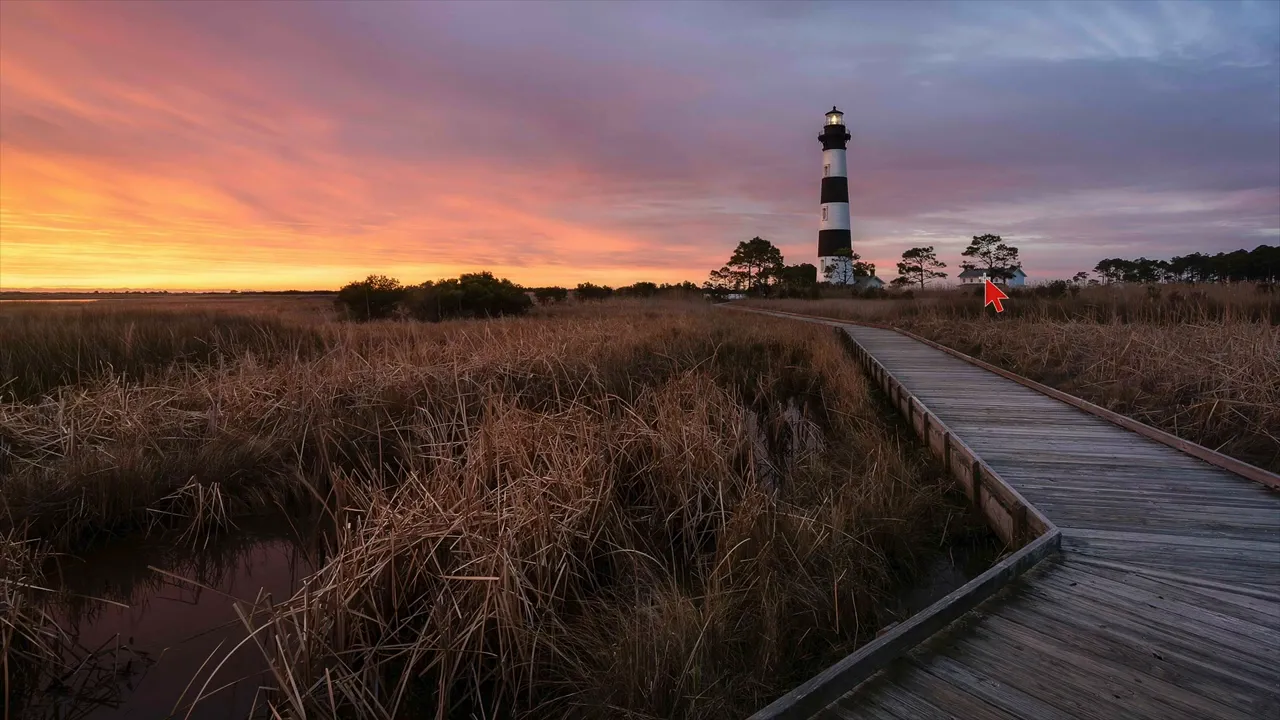
That's my personal preference: I enjoy photographs that feel simple and clearly defined. Simple doesn't mean the scene contains only one object. It means the important elements have a clear relationship.
I still get this wrong sometimes. On a trip to Moab, I photographed a scene with warm evening light across a cliff face. I loved being there, and I loved the scene as a whole. But in the photograph, my eye jumps between a small tree, scattered vegetation, and details across the ground. The feeling I had in the location didn't translate into a clear composition.
Another photograph from that same trip, made in Canyonlands National Park, works much better for me. A prominent tree directs attention toward a bend in the river. There's an obvious relationship between the foreground subject and the landscape beyond it.
The habit that helped me most was asking two questions before taking the picture:
- Why do I want to photograph this scene? Identify what you actually love about it.
- What's distracting me from that? Look for anything competing with the reason you're making the photograph.
Pay particular attention to the edges of the frame. Branches, twigs, small trees, rocks, and boulders can pull attention away from the subject, especially when they intrude awkwardly into the composition.
Move your eyes around the entire frame before pressing the shutter. Sometimes a slight zoom or a couple of steps forward removes the distraction. Other times, a small cleanup in post-processing may be necessary. Either way, the goal is the same: make the subject easier to understand.
Build depth into the composition
The second part of my composition problem was flatness. I wasn't thinking about foreground, middle ground, or background. I was simply pointing the camera at something interesting.
In one early photograph, I placed a tree on a grassy hillside. There was grass in front of it, but the hill dropped away immediately behind the tree. To my eye, the image offered very little sense of distance or progression into the scene.
A winding stream creates a completely different experience. Nearby leaves and rocks establish the foreground, the water travels through the middle of the frame, and the upper section of the stream carries attention into the distance.
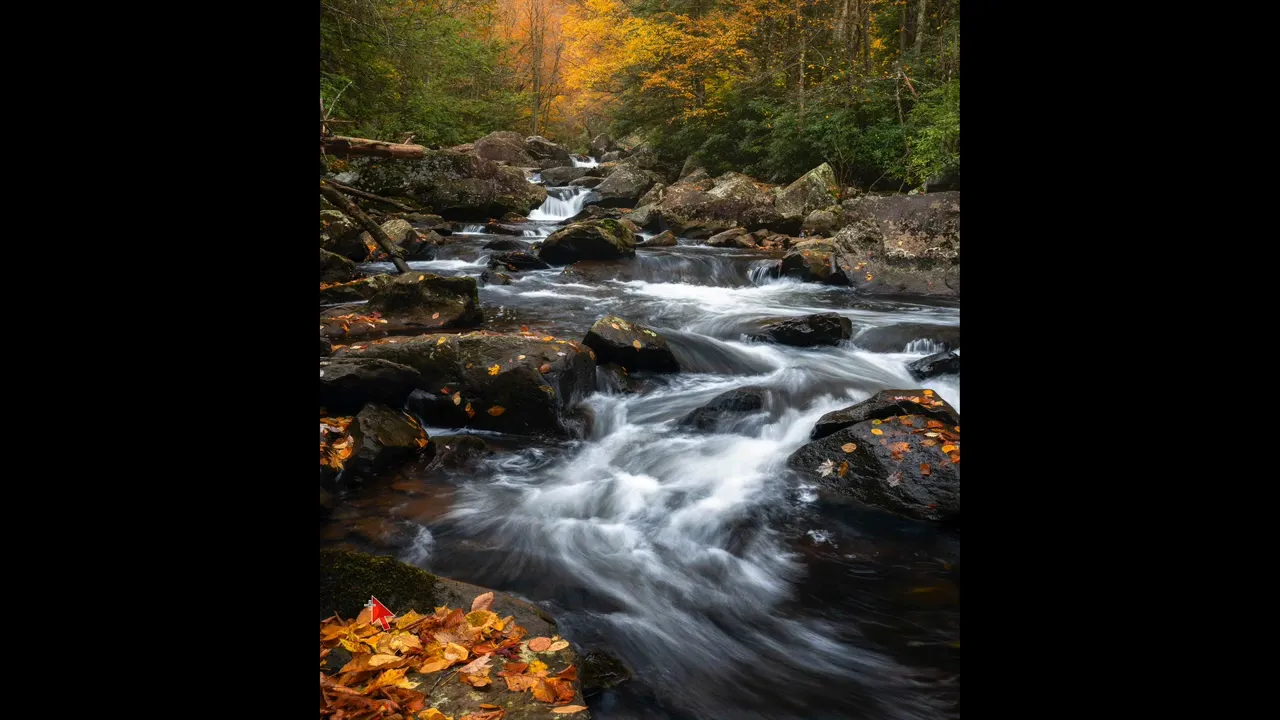
That kind of arrangement makes a photograph feel more three-dimensional. I want an image to feel as though I could reach into it, rather than simply look at a flat surface.
A strong foreground element can anchor the photograph and start that visual journey. In a coastal scene, a nearby rock can lead toward breaking waves and then distant mountains. In a photograph near Corona Arch, a clump of grass and subtle lines in the sandstone help guide attention toward the arch in the background.
But this isn't a requirement to force a foreground object into every photograph.
I love using telephoto lenses, and those compositions often don't include obvious foreground, middle-ground, and background layers. In those situations, I pay more attention to light, shadow, and reflections.
For example, reflected tree trunks in a quiet lake can guide attention toward the shoreline. In another photograph made at around 200mm, bands of light and shadow across vegetation give the scene dimension even without distinct spatial layers.
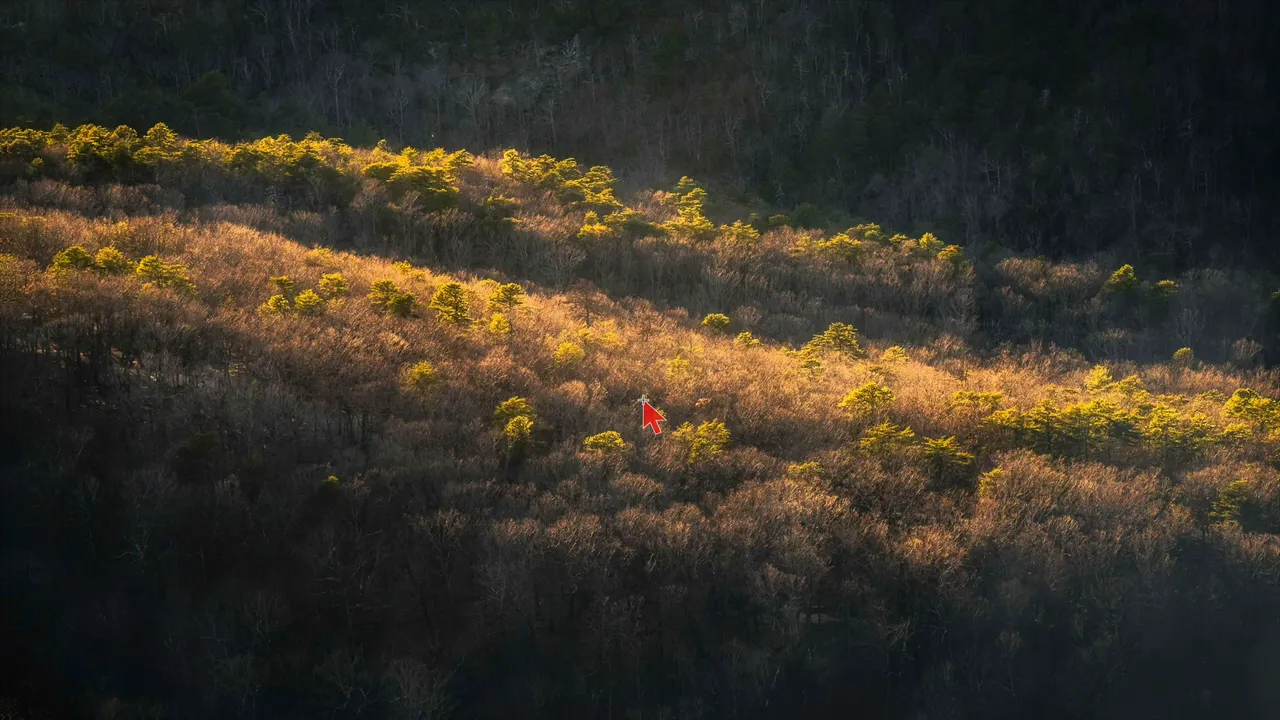
The lesson isn't that every landscape needs the same formula. It's that depth deserves your attention, whether you create it through physical layers or through the way light describes the scene.
2. Ignoring the Light Meter and Histogram
For roughly my first two years, I paid almost no attention to two of the most useful exposure tools in my camera: the light meter and the histogram.
I could see the little indicator moving along the exposure scale, but I didn't really understand what it was telling me. It wasn't until my third year that I started using that information intentionally.
Treat the meter as a reference, not a verdict
Your camera's exposure scale generally has zero in the center, with negative and positive values on either side. It shows an exposure reading relative to what the camera considers its metered baseline. The exact scale and display vary by camera and shooting mode.
Zero is not a guarantee of the best exposure for your photograph. It's the camera's assessment, and you still need to decide whether that assessment protects the parts of the scene that matter.
I generally prioritize my highlights. With my camera, I'm comfortable recovering a certain amount of shadow detail, so my exposure reading is often around a stop below the metered baseline, sometimes more.
That isn't a universal setting to copy. It comes from understanding my camera's dynamic range and knowing how much I can adjust its files afterward. The useful habit is paying attention to the meter and making a deliberate choice instead of assuming the camera has everything handled.
Use the histogram to check your highlights
I was usually shooting in aperture priority, not full auto, but I still came home with bright patches in the sky that were overexposed. The camera might have considered the overall exposure reasonable while those highlights were losing detail.
The histogram helped me recognize that problem in the field. I wasn't trying to produce one particular histogram shape. I was checking whether bright areas, especially the sky, were being pushed too far toward the right-hand edge.
The point is to evaluate the exposure, not to make the graph look attractive. Protecting important highlight detail gave me more usable photographs and reduced the time I spent trying to rescue overexposed areas in post-processing.
Connect the readings to your camera settings
Paying attention to these tools also helped the exposure triangle make sense. Aperture, shutter speed, and ISO stopped feeling like three separate concepts and started feeling connected.
For example, if an exposure is too bright and you're controlling the settings directly, a smaller aperture or a faster shutter speed can reduce the light reaching the sensor. In aperture priority, exposure compensation lets you request a darker or brighter exposure than the camera's baseline.
Rather than changing settings blindly, you can observe what happens to the meter and histogram. That feedback is valuable both for improving the photograph in front of you and for understanding how your camera works.
3. Underestimating the Time of Day
I knew from the beginning that sunrise and sunset were important for landscape photography. I photographed both regularly. But I also spent hours shooting under midday sun and wondered why those photographs rarely became my favorites.
I don't regret the practice. Especially as a beginner, getting outside and making photographs is better than doing nothing. There's value in learning your camera under all sorts of conditions.
What I hadn't fully appreciated was how dramatically the same landscape could change with the light.
The difference can be hours or just minutes
On one trip, I photographed a cliff face about an hour and a half before sunset. The light was harsh, and the scene had strong contrast.
About 20 minutes after sunset, with the sun already behind the mountains, soft ambient light illuminated that same cliff face. The result felt completely different. The location hadn't changed. The quality of light had.
Another example came from a sunrise scene in Arches National Park. As the sun rose, I caught warm light across the landscape before it moved above a cloud bank. Roughly 30 minutes later, that warmth was gone, and the light looked much flatter.
Those comparisons taught me to pay attention not only to sunrise and sunset themselves, but also to the periods immediately before and after them.
- Keep practicing whenever you can. Midday photography still has value, especially while you're learning.
- Prioritize promising light for your strongest compositions. Give yourself opportunities around sunrise and sunset.
- Don't assume the session ends when the sun disappears. The remaining ambient light may be exactly what the scene needs.
For my work, most of my strongest images have come from those early and late parts of the day. Understanding that helped me use my time more intentionally.
4. Spending Too Much Time and Money on Gear
This one is personal because I took it much further than I should have.
When I returned to photography in 2015, I bought an entry-level Nikon D3000-series kit for about $400. I don't remember the exact model, but I remember what I did next.
I used it for two weeks. Instead of learning everything I could about that camera, I researched other cameras.
Then I returned it and bought a full-frame Nikon D750 setup for around $2,000. Somehow, after just two weeks, I'd convinced myself that a crop-sensor camera was holding me back.
That lasted about two months. Once again, instead of practicing and learning the camera, I kept researching. I sold the D750 and moved to a Sony a7R II setup that cost roughly $3,500.
Within a few months, I'd gone from an affordable beginner kit to a much more expensive system without putting the same energy into becoming a better photographer.
Invest in using the camera, not just replacing it
What I wish I'd done is keep the original Nikon and put the difference toward travel and experience.
I would much rather have had the opportunity to photograph Yosemite with that entry-level camera than own an expensive system and have no money left to go anywhere. For me, the experience and photographic opportunities would have been worth far more than those early upgrades.
That doesn't mean you need a famous destination to make a good landscape photograph. My mistake was allowing equipment research to take the place of actual photography.
A more expensive camera doesn't replace practice, composition, light, or experience. Learn the camera you already own. Read the manual. Find out what it can do. Put your attention into making photographs before deciding that your equipment is the thing holding you back.
5. Photographing Everything at Eye Level
For a long time, my approach to camera height was incredibly consistent: put the camera where my eyes were.
I'd arrive at a scene, extend the tripod, mount the camera, and start composing. I'm about six feet one inch tall, and I don't have the best back, so I usually chose a height that let me stand comfortably without bending over.
In other words, comfort was making one of my composition decisions for me.
Find the position before setting up the tripod
The fix was simple, but it required slowing down. When I arrive somewhere now, I try not to pull out the camera or tripod immediately.
If possible, I'll arrive well before the good light, sometimes an hour early, and spend that time exploring. I want to understand the scene before committing to a position.
- Look around without the camera. Identify what attracts you and what distracts you.
- Explore different angles. Consider the scene from more than the first convenient spot.
- Test compositions handheld. Raise and lower the camera, and try pointing it upward or downward.
- Set the tripod to suit the composition. Don't let its initial height determine the photograph.
A low tripod position, a higher camera position, or a change in camera angle can produce very different arrangements of the same elements. The possibilities are much broader than the view from standing height.
The important thing is to make camera placement a creative choice rather than an automatic habit.
Bonus Mistake: Editing JPEGs Instead of Shooting RAW
I spent roughly my first 18 months editing JPEGs instead of shooting RAW. If you're planning to edit your landscape photographs, this is one camera setting I'd encourage you to revisit early.
Switching to RAW helped me understand both post-processing and the capabilities of my camera. I could explore how much shadow detail the files contained, how the camera handled dynamic range, and how far I could push an image during editing.
For additional background on the formats, Adobe's RAW versus JPEG guide explains their differences and editing tradeoffs.
Shooting RAW doesn't replace getting the exposure right in the field. But if editing is part of your process, it gives you more flexibility to work with, and I wish I'd started using it from the beginning.
Recognize the Mistake, Then Change the Habit
The common thread through all of these mistakes wasn't a lack of better equipment. It was a lack of awareness.
I didn't realize my compositions were unclear, that I was overlooking useful exposure tools, or that I was choosing camera height out of habit. Once I could identify those problems, I could start correcting them.
You don't have to fix everything on your next outing. Start with one habit: identify the subject, check the frame edges, read the histogram, or explore a lower camera position. Making mistakes is part of learning. Recognizing them sooner is what helps you move forward.


